ATCO 'Power Propelled Rotary' 70's renovation project. Can anyone help?
Forums
Sorry Wristpin, I cannot
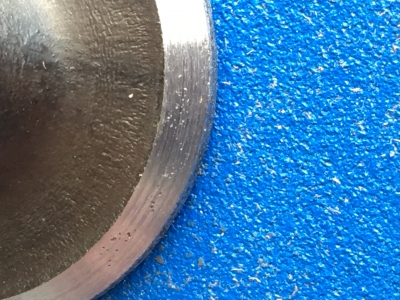
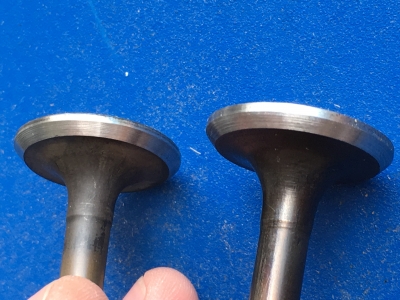
Sorry Wristpin, I cannot agree with you, both valves looked 'pocketed' to me and need refacing, they will never seal correctly.
The seats need attention as well, but they are nowhere near as bad as the valves.
Blast! And it was all going
Blast! And it was all going so well... :(
Any ideas where to buy a valve/seat cutting tool cheaply? 45degrees yes?
...and valves

Steady on chaps, things may
Steady on chaps, things may not be ideal with the wear to the valves but it is worth trying out a little trick that a certain gentleman only passed on to me last week when I commented about the difficulty of lapping the micro valves in a Stihl 4mix engine.
Take a length of round steel or wooden dowel rod and glue it to the head of the valve with an epoxy glue to form a handle to spin the valve with. Hopefully it will stay put long enough for you to have a good go at the valve seats and the pitted surface may even work to your advantage by giving the glue something to hold on to, I am sure you will be able to scrape of the glue afterwards.
From past experiences with engines both large and small so long as you can achieve a valve seat that has no pitting severe enough form a passage for the gasses to flow the valve will seal enough for your engine to run.
Yes ideally it would be best to true up the valves and recut the seats but if this is not readily achievable then you have little to lose by having a go.
We used to recut the valves from our Blackstone marine diesels on a lathe but I have never tried it on a small engine valve so if you experiment with that option you do it at your own risk.
Hi Hillsider, thanks for
Hi Hillsider, thanks for joining us. I was thinking about using a hot glue gun to attach a piece of dowel, but not having ground valves before I have no idea how perfect they need to be, or what the pitfalls may be.
No problem re chipping in to
No problem re chipping in to the the thread you have going I am sure that my colleagues here will not mind.
Re using the glue gun by all means give it a try you can't do any damage to anything if it comes away and you have the epoxy glue method in reserve to fall back on.
Re the valve seats, yes ideally they need to be as near perfect as you can get them but that just may not be achievable without cutting the seats. So long as you gan get a gas tight seal the presence of very small pits in either seat will not necessarily cause your engine any problems, certainly not in the short term, bearing in mind it is not in a high performance vehicle.
The only other thing to look out for is that when you have finished lapping in the valves they should not sit below the upper surface of the valves seatings in the cylinder block if this is the case then you would need to look for replacements.
I'm sure they won't either,
I'm sure they won't either, The more the merrier as far as I'm concerned :)
I thought the glue gun, if it sticks, is a good option as there is no glue setting time, so even if it only lasts a shortish time, it only takes a minute to redo and off we go again.
That's a really useful tip re the level of the valve heads after lapping, thanks.
I do not think you will ever
I do not think you will ever be able to reface the valves as they are, they need to be refaced. As the valves are virtually useless as they are, you could try this to reface them:
Do you have a stead hand and eye? , do you also have a pillar drill and a sharp file ?
Put the valve into the pillar drill chuck and tighten securely.
practise holding the file against the valve at the correct angle until you are sure you can do this with the pillar drill running
Make sure you are not wearing anything loose i.e. tie and that you are wearing goggles.
Start the pillar drill
Put your practise in to operation by holding the file against the rotating valve, only remove sufficient material to remove the rut and clean the valve up.
You should now be able to grind the valve into the seat, you need to get a dull seat to show all the way around, if you cannot get this quickly, then you will probably have to get the seats re-cut
Now there's a good idea! Yes
Now there's a good idea! Yes I have a pillar drill, yes I can break out a brand new smoothing file and yes, being a jeweller, I hope I have a steady hand :D
When you say to the 'rut' I'm not sure 'exactly' what you are referring to. Do you mean the slight curve of the ground surface when viewed from the side, a lip, the pits, or something else?
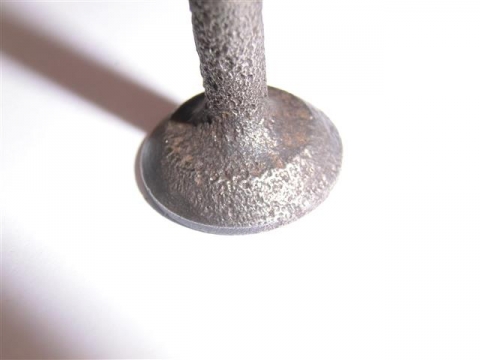
Since yesterday's photos, I have lapped it further so there are only a few tiny pits now. This is the worst bit;
Would reassembling the valves and putting fuel into the inlet and exhaust ports be adequate to confirm a satisfactory seal?
And once reseated (fingers crossed) would carefully rubbing the valve stem on emery laid on a surface plate be the best way to adjust the gaps again?

I take on board Hortimech's
I take on board Hortimech's comments but while the "before" image certainly looked rutted or pocketed the " after " one didn't look too bad - taking into account available equipment. May be I need to visit a certain high street opticians.
Being in the fortunate position of having re-facing and re- cutting equipment I do it as a matter of course, The valve will be ground to 45 degrees and the seat likewise. There is a school of thought that says there should be a one degree difference between valve and seat to aid initial bedding in - life's too short, not joining the debate!
What is worth noting is that recutting the seats can result in a too wide seat contact patch on the valve which is undesirable as it spreads the fixed force of the valve spring over too wide an area to aid the self cleaning action of the valve shutting against the seat . That situation then has to be corrected using 30 and 60 degree cutters. Conversely, too narrower seat reduces the desire able heat transfer between valve and block and can lead to premature erosion of the valve face.
Re facing on a lathe should be doable with a nice sharp tungsten carbide cutter. My only comment re filing on a drill press is take great care, a file tang stuck into the palm of your hand can be quite painful - I'm told.
Maybe I'll try the drill
Maybe I'll try the drill technique, I'm confident I have the finesse not to impale myself :D, but I would like to be sure what I am trying to achieve before I start. Is the slight curve on the seat undesirable or is it mainly about a smooth seal? Do the tiny grooves that run around the seat need to be removed or is that just the way they grind?
The 'before' pictures seem to
The 'before' pictures seem to show a 'rut' around the seating area and I think I can still see it on the 'after' picture. The 'land' on the valve should be flat, without ruts or burnt portions, all the way around. If everything is ok, it shouldn't take much to grind the valve into the seat with lapping paste, if you have to take any great length of time, something is wrong.
The procedure I described is a 'Bodge', but sometimes you have to bodge to get things done ;-)
I haven't spent that much
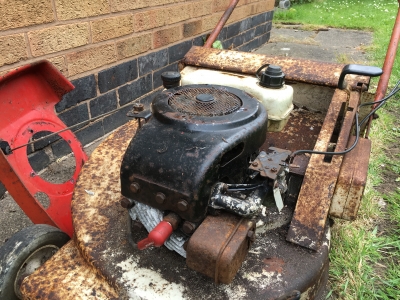
I haven't spent that much time on it considering the motor is still on the mower(horizontally), which makes it awkward. The hot glue & dowel method has been pretty helpful but it would've been easier if vertical. I'll try the drill method, re-lap and see what it looks like. If not I'll seek out a valve re-facer.
There are different grades of bodge;)
Can you fold the handle bars
Can you fold the handle bars and stand it on its tail? Makes life easier with gravity on your side.
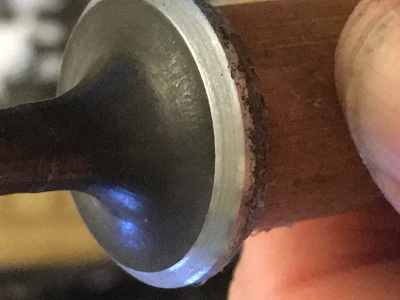
Ive done the pillar drill and file thing and I think they look good, but I'll let you guys be the judge. What do you think? The seat faces look pretty spot on to 45 degrees and are a bit 2.3 mm across and the little side edges are 1.3mm (the photo makes one look wider than the other but it's just the edge isn't quite as crisp.
The tilt thing is a good idea, I'll give it a go when I lap these back in.
Definitely looking good,
Definitely looking good, "little side edges", = margins!
Now lets see them after a light lapping in.
I'll post the photos when
I'll post the photos when done. I assume I need to lap 'til the seats are the same width as the valve surfaces
No, ideally the contact patch
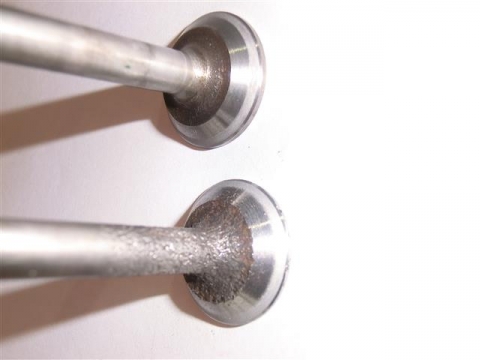
No, ideally the contact patch on the valve face should be a narrow track around the centre of the valve face about 2mm wide and midway up the face but without the wherewithal to "move" the seat you may have to just put up with how it comes; probably on a worn engine, nearer the top than the centre.
These two valves are from an engine that is well worn and had sat around in damp conditions with the exhaust valve open. Ideally the contact patches need to be moved to the centre of the faces and away from the margins which themselves should be at least a couple of mm wide but beggars cant be choosers and these two were for a restoration project that is only going to be started occasionally and never worked hard.

That sounds like it might
That sounds like it might work to my advantage as I think the seats are convex, so they should lap up well fingers crossed
First lap done, what do you
First lap done, what do you think? Does it need more?
Looks good to me so long as
Looks good to me so long as it is the same all the way round.
Great, seems pretty even all
Great, seems pretty even all round. I'll carry on then.
Thanks
So now for getting the
So now for getting the clearances back . If you need to remove metal from a valve stem it is desirable that the end of the valve is maintained at a right angle ( 90 degrees) to the stem. Without specialist equipment the possible options are holding the valve head down between soft jaws in a vice and filing the end of the stem with a sharp flat file or doing something similar with a carborundum stone.
Make frequent checks to ensure that you don't remove too much metal and wipe clean the stem before reintroducing it to the guide to avoid contamination with abrasive material.
Done! Clearances inlet 0.005,
Done! Clearances inlet 0.005, exhaust 0.009.
Now what do we think are the best numbers to go to?
Do I begin to see light at the end of the tunnel?
Manifold and carb faces to check for flat and find one of these from somewhere;
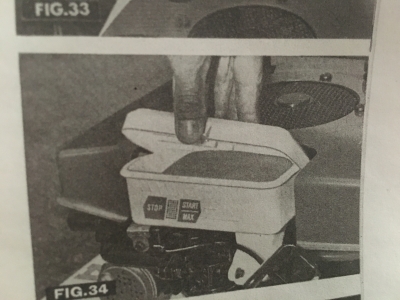
...and off we go...hopefully!
Great, I could use my famous
Great, I could use my famous finesse on my belt linisher, that way I can maintain 90 degrees.
What clearances did we decide? Or did we not?
Current gaps;
Inlet - 0.005'
Exhaust - 0.008'
The linisher should do the
The linisher should do the job well. Theres a bit of a disparity between two manuals re the clearances but 8 for the inlet and 12 for the exhaust seems to be the average. Just don't go over 12 for the exhaust so as not to upset the decompressor.
That's great Angus, thanks.
That's great Angus, thanks.
I've realised that the air cleaner body I found on the other Tecumseh has no lid. If I was to vac-form a replacement of sorts, is there anything I need to know, eg. how airtight should it be? I have messaged the Hailsham mowers and Meadow re a correct one, so we will see.
As air tight as possible as
As air tight as possible as you want it to draw the " clean air" from under the engine cowling rather than whatever is floating around . Pro tem even a bit of cling film will do .
Ok, thanks, I'll see what I
Ok, thanks, I'll see what I can rustle up if needed, but had an email back from Johnathan Cruse at The Mower Centre in Hailsham, saying he has the originals in stock for a few quid, so hopefully won't need to improvise.
Clearances done, valves in
Clearances done, valves in place, breather box cover on, manifold and carb gasket surfaces flatted.
...Now, what's my next move? Complete reassembly and attempt to start? Or fit head, torque the bolts and pause there? Anything else to do first?
What about paint? It's not a concours machine, just a renovation, but I'd like it to look better and a little protection wouldn't be a bad idea as I intend it to be a working machine. How much extra work is it to gain better access to the bodywork?
... I'm thinking hammerite white for the body (hammer finish because the surface is rough) and hammerite smooth red for the cowling etc. Any thoughts?
How best to prepare the surface for paint without disassembling the machine significantly further? Wire brush and emery, but what to degrease with?
Any suggestions most welcome.
Other than to say that the
Other than to say that the current ( ecologically acceptable?) formulation of Hammerite is not a patch on the product of old when made by Finnigans of Prudoe, I'll leave it to others to advise on paint and painting; but you could just give it a coat of Owatrol and leave it at that.
Now this stuff looks
Now this stuff looks interesting! Not come across it before.
Which type would I use? The Owatrol Deco paint? Do I need to use the oil first, or primer? Do I need to degrease first?
Bewildered by the choice of options.
Or are you suggesting just a protective oil finish and retain the 'neglected' look?
They don't seem to do red :(
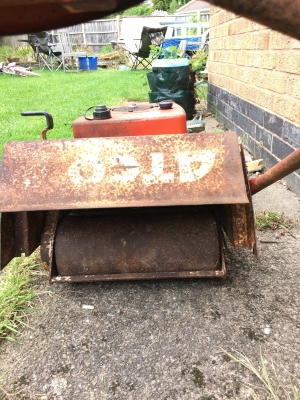
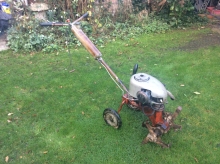
I only use it for machines
I only use it for machines being left in their "working clothes" This little cultivator had enough original paint on it to be left alone and just be given a coat of Owatrol to preserve the patina.
. If you are going for a full repaint you will at least have to rub every thing back to a sound surface and treat any rust . Ideally strip it back to bare metal and that means completely dismantling - possibly further than you want to go?
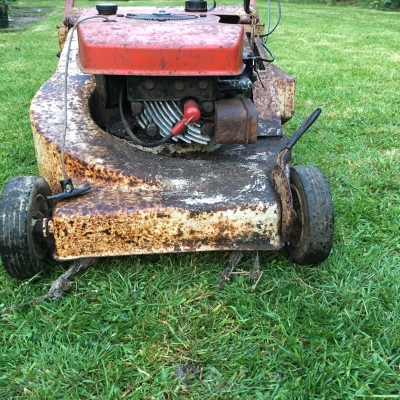
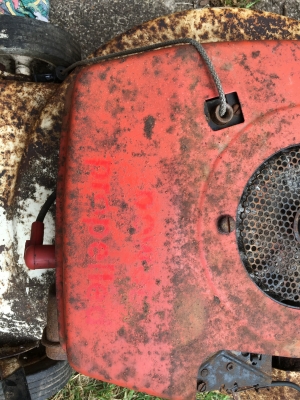
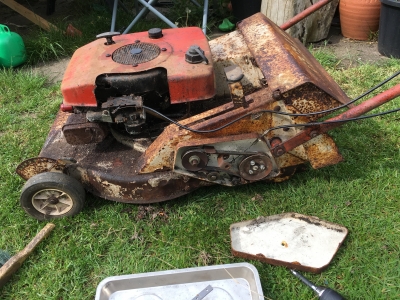
A reminder of it's general
A reminder of it's general appearance;
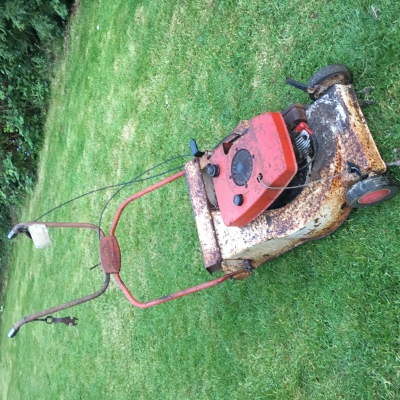
Not sure about the appearance, is it too far gone? If it were still predominantly white and red I'd be more than happy to celebrate the patina, but I'm thinking it looks rather rough. I'm not wanting a concours machine but if it is a bit rare, it would maybe be nice to take to a show or two.
I was originally thinking of a wire-brush/rough rub down followed by a Hammerite type product to deal with the rust (not too worried about the surface finish), my Dad would probably have done a 'mend and make do' brush painted finish :), but if I do decide to paint I wasn't sure how best to degrease adequately. Looking at the Owatrol website, they talk about using the 'Deco' rust paint on top of a coat of their oil, but I think I'll still need to degrease it before the oil.
As far as degreasing goes you
As far as degreasing goes you can use a chemical degreaser such as Gunk or Jizer worked well into any accumulation of grease and hosed off with a pressure washer. If you have access to a hot water pressure washer, so much the better.
Surface rust etc may be removed with wire brushes and flap wheels on an electric drill. After that it's up to you.
Brilliant, I have some Jizer.
Brilliant, I have some Jizer.
I'll have a think on the paint :)
Thanks again
Andy
Ps. You mentioned the belts were the same aas from the suffolk super colt, would you know the pt. no. for them or would the Hailsham place know what I need? (assuming they have them)
Under drive belt - crank to
Under drive belt - crank to worm box, F016L10266, M21.5
Side drive belt - worm box to rear roller F016L08476, M19
The M section belts should be available from your local factors or on line from suppliers such as Simply Bearings.
Hahaha! You never cease to
Hahaha! You never cease to amaze me! That's fantastic thanks a lot.
ps. Hailsham mowers think they may have quoted me for the wrong air cleaner part :( (maybe the element as opposed to the body). As I initially sent the photo of it from the manual, but followed up with the part no you sent me to be safe. Just hoping they may still have one. Peter Elliot hasn't replied as yet.
clearances both about 0.10
clearances both about 0.010
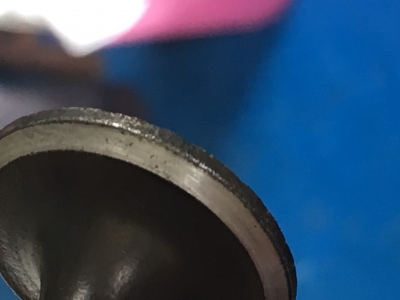
I haven't done much at all to them so far as I can't get the valves upright to lap and the problems with suckers slipping. I wonder if I should persevere?
The valve heads aren't very conducive to good suction, see below
I could even use a little hot glue, which would easily come off after or do you think I will need to have them refaced.