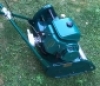
Marquis rescue
Not a restoration but a commercial standard refurbishment intended for resale. The machine had been languishing in a back garden, standing on the soil and part covered by the upturned grass box. Surprisingly, said grass box is in good condition and would probably fetch several times the cost of the mower which came with the Amal carb and Siba starter -both dismantled, but complete. In normal times common sense would say job it all out as parts and weigh in the rest; but in these "not normal" times and being of a certain age I fancied a stay at home project.
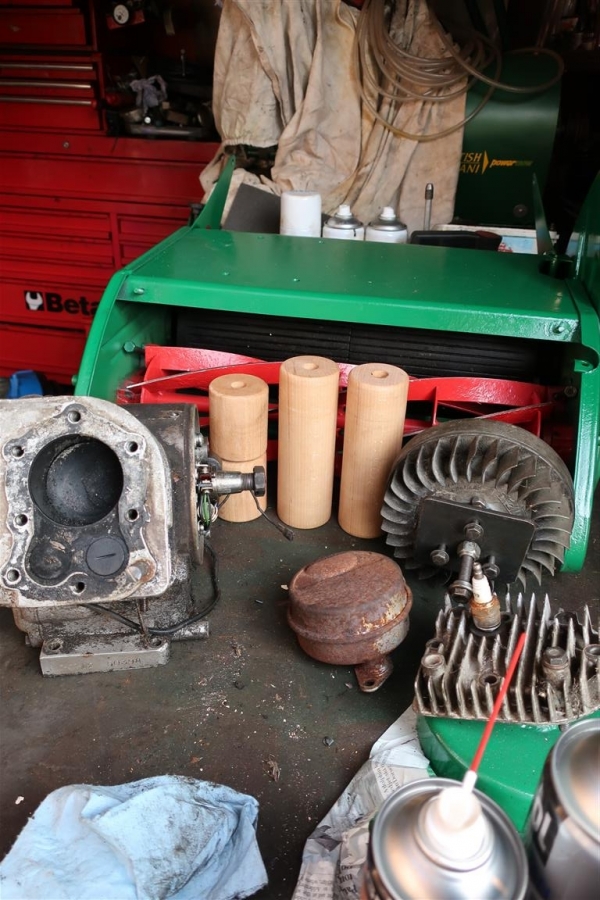
So far, carburettor cleaned and assembled, Siba reassembled with a new spring , rear roller removed, freed off and one ratchet pawl replaced, cutting cylinder ground , bottom blade refaced, new set of front rollers turned from a handy bit of beech, and the worst of the chassis rust cleaned off, treated and repainted.
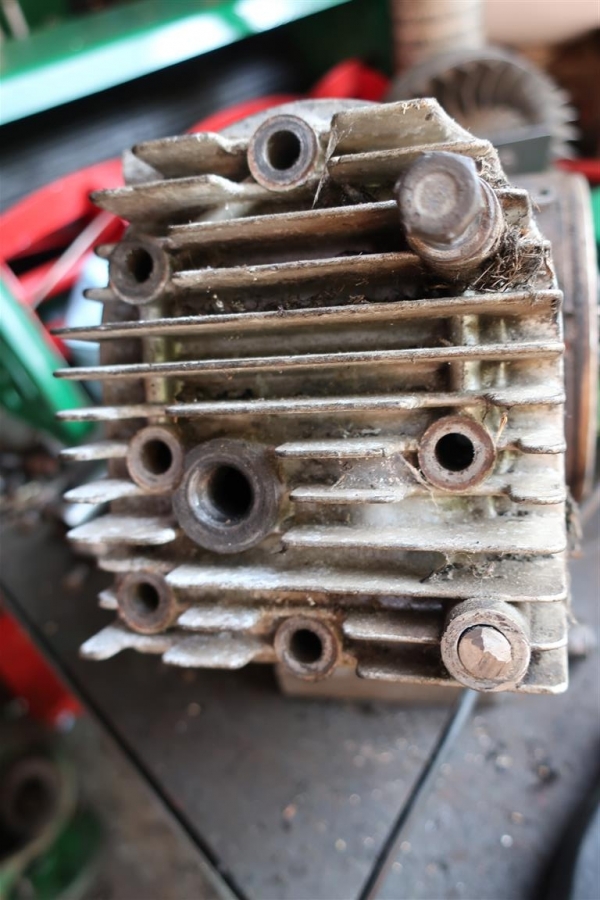
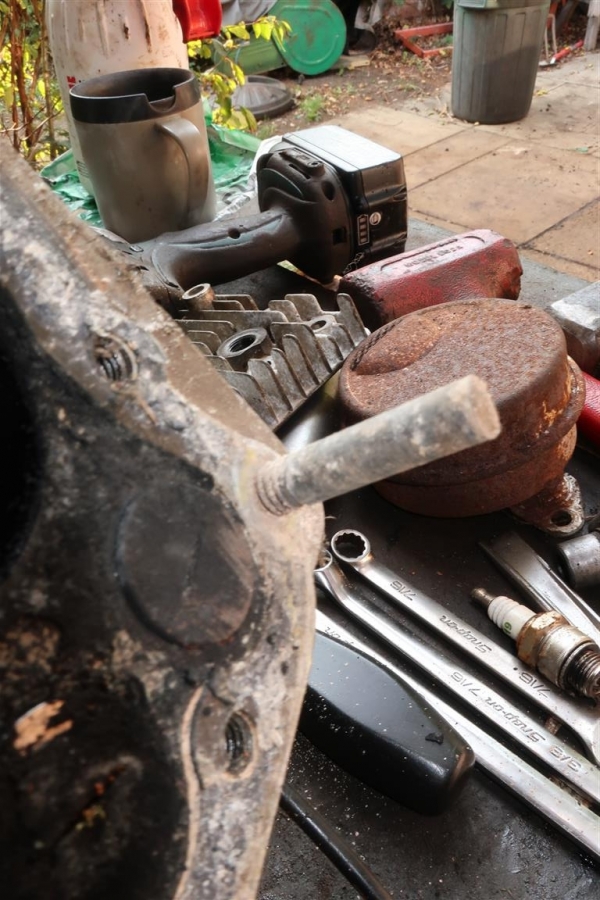
Yesterday it was the turn of the engine which gave rise to the first unexpected issue - the lower of the two long bolts that, as well as clamping the head, also secures the cowling and the carburettor stay, was stuck fast. Even a cautious pull with quite a long breaker bar failed to move it . I say cautious as the last thing I needed was a bolt sheared off level with, or even below, cylinder block level. Applying much heat to the bolt head was not on as I didn't want to damage the engine cowling or set fire to the copious amount of oily gunge that was under the cowling; so the bolt head was cut off allowing the cowling to be levered off over the remaining stub. The remaining head bolts were removed and after some cautious sideways tapping and levering the head lifted enough to rotate it around the headless bolt and then lift off. My initial "Plan A" was to drop a nut over the now protruding stud just clear of the block and weld the two together in the hope that the heat from the the welding and the purchase provided by the nut would result in movement. However with nothing to loose, I protected the block face and heated the stud to cherry red and after allowing it to cool a bit , dosing all round it with penetrating fluid - including turning the block upside down and filling the empty end of the bolt's drilling, the Vicegrips* were applied and it moved -just a bit. A bit more incremental back and forth, and it was out - Phew!
* What happened to Mole Grips?
The good news is that there is very little bore wear but interestingly both valves have EX embossed on their heads, suggesting that for some reason, the inlet valve had been replaced with whatever someone had around at the time. A line of Red Hermatite around the crankcase cover joint suggests some fairly major work at some time - possibly new piston rings; but why the new valve?
Hopefully no more nasties to follow.

Forums

have never known them as
have never known them as anything else other than my ultimate bodge / get out of jail tool.
A tool of last resort, maybe, but there are occasions! Together with assorted magnets, “self locking pliers” , to use the generic name , are also indispensable around the welding bench. I thought that the Mole brand had disappeared, but apparently not.
Thank you for the offer of the muffler but it was only surface rust on the one in my image. A session with the rotary wire brush, followed by baked on black stove enamel and the job’s a goodun.
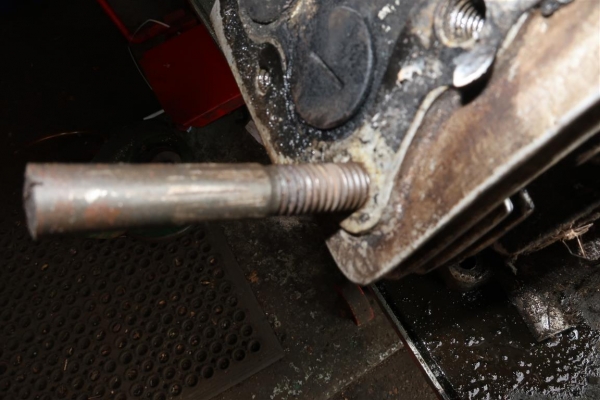
The replacement of the inlet valve with an exhaust spec one will remain a mystery but, at least it will be up to the job. I was so chuffed at having removed the head and it’s suborn bolt that I totally failed to notice that it was 3/8” diameter instead of the standard 5/16”. It was only when I started to reassemble the engine this afternoon and a 5/16 bolt dropped straight in without touching the sides that I twigged . Fortunately a dig through a bucket of miscellaneous hardware produced suitable replacement.
That engine has history !
Image to follow.
Looks like the oversize bolt
Looks like the oversize bolt torqued up well, maybe too well..would it be worth following through with a 3/8" tap in case it binds again?
Did just that !
Did just that !
Good work on the head bolt,
Good work on the head bolt, well thought through approach. Looks like you have some nice rollers coming on. Hard to tell condition of the exhaust can, but if it's holed I have a decent spare you can have if needed. Odd on the valves as I would have thought an ex valve might be more prone to needing replacement than inlet - given it appears it's had a complete strip, maybe the inlet just got lost in the service shop?
I have never known them as anything else other than my ultimate bodge / get out of jail tool.