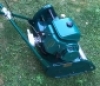
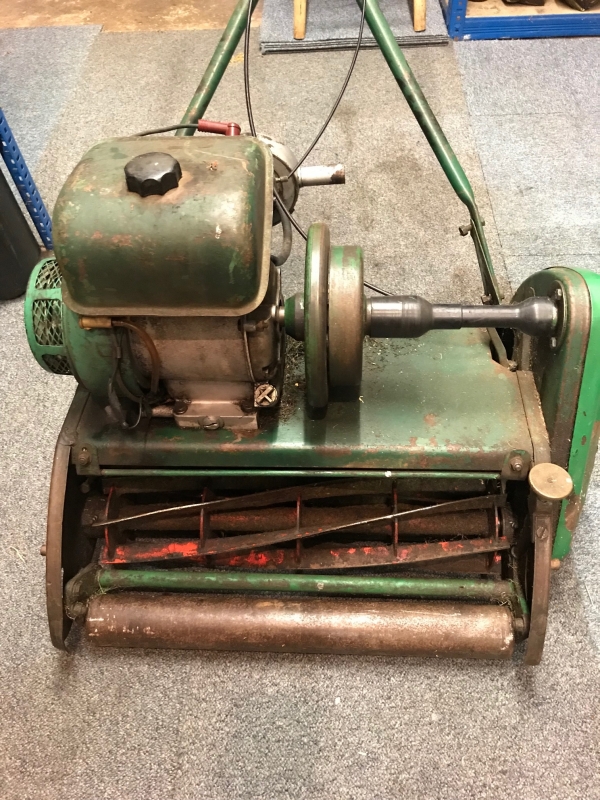
Starting on a Marquis 20"
Hello, I'm looking at starting a general overhaul of a Marquis 20"
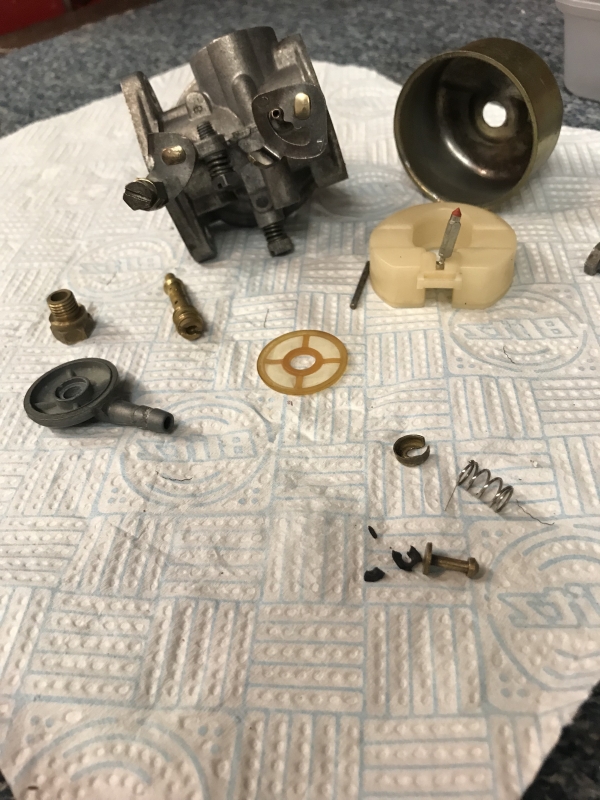
There are obvious things that need attention, but I would like to strip it down apart from the engine which has good compression feel, starts and run, but I will be stripping the carb.
I'm having a real problem locating any service manuals or exploded diags having trawled the internet including the OLC & Jacobson site.
I could of course just crack on, but after the Suffolk 43, appreciate how useful exploded diagrams are, and service manuals a big bonus.
Any pointers much appreciated.
Thanks Chris
Forums

Pictures being worth... true
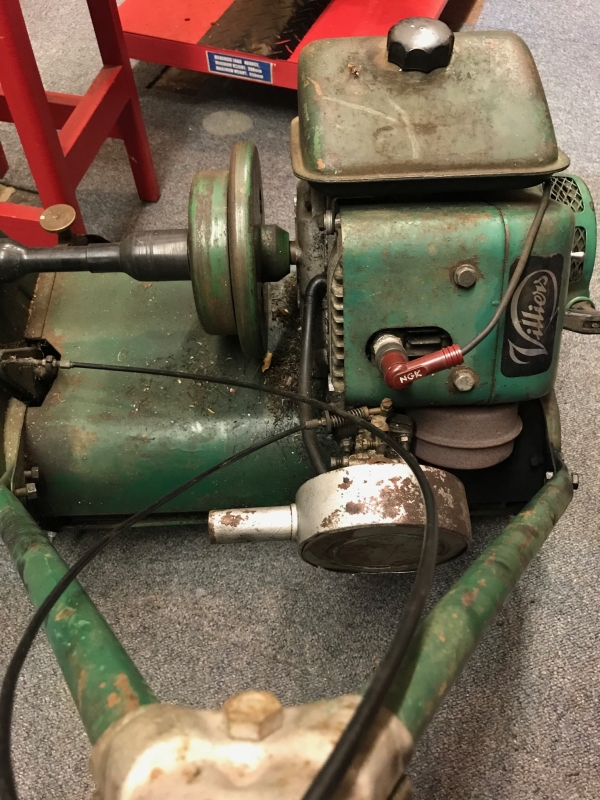
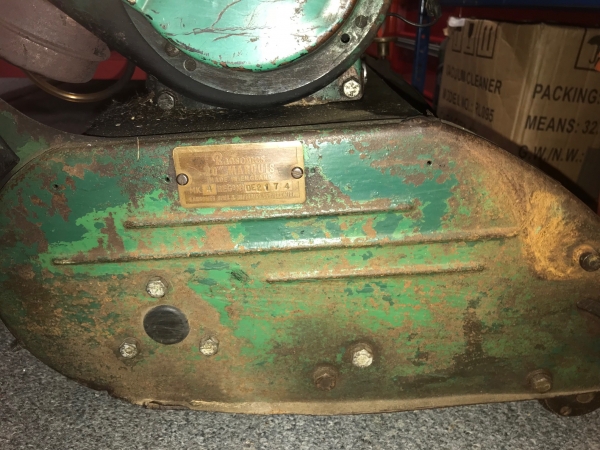
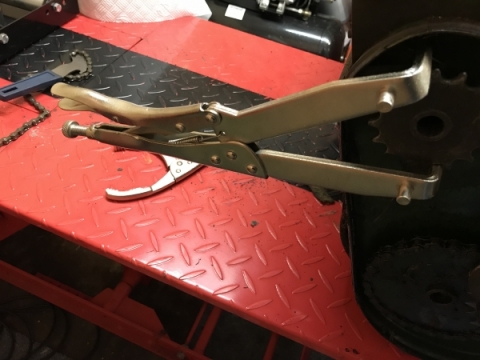
Pictures being worth... true true. Pretending to know what I'm on about, Del Orto carb, sloper motor, help with diagrams / manuals much appreciated.


Ah, that one!
Ah, that one!
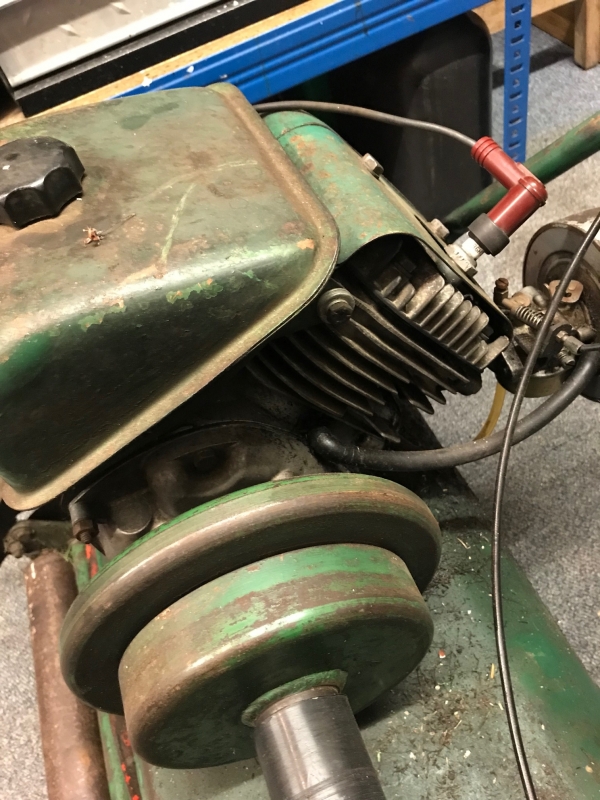
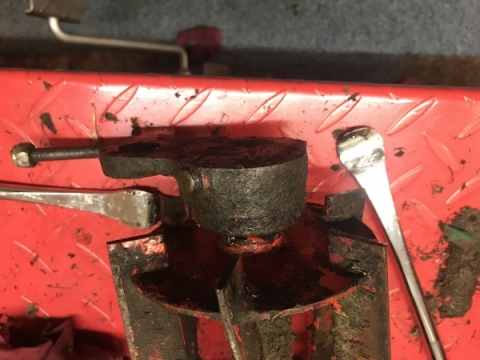
It’s a Villiers F12 engine but other than the pics previously posted on this forum I’ve never seen one with a Dellorto carb. I can post a scan of an F12 manual and also one for the carb, but as for the two together .......... Could it be a diy conversion? The steel front roller is more Auto Certes than Marquis and the recoil starter is unusual.
pm sent.
SOMETHING VERY STRANGE GOING ON this post disappeared - hence the next one - and has now reappeared !!!!!
Have just replied on the
Have just replied on the forum but it has disappeared! Also have sent you a PM
I have a Sloper F12 manual and one for the Dellorto but not one showing the two together.
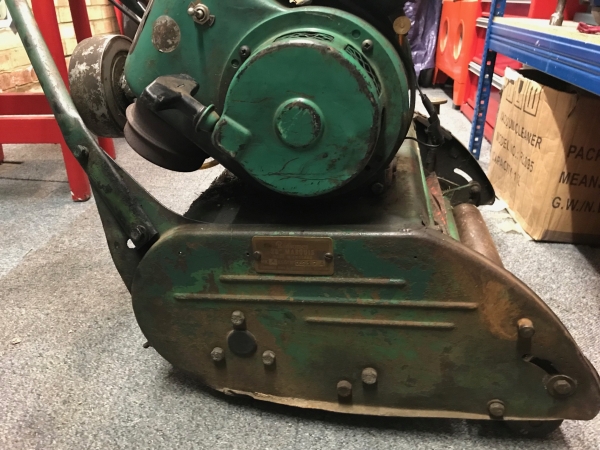
Bits of your “Marquis” are Auto Certes - the front roller and microset height adjuster . Not sure about the chassis as a tru Auto Certes would have had extended rear roller axles for transport wheels - often cut off - but yours shows no sign of it ever having had them.
i think that there’s a fair chance that your machine is a diy amalgam of Marquis and Auto Certes.
Thanks as always, even with
Thanks as always, even with my limited knowledge of mowers I think things are not quite right. Possibly by a diy-er - not of the most caring or skill full type! The front roller (which does not roll) and the height adjustment (which does not adjust) have been dropped in I think, the right hand chassis panel is curved in towards the front where the roller attaches, I don't believe this is by accidental impact, more to get the roller to align or just the sheer force of bolting it up.
I'm going to soldier on, not best pleased grrr, the carb / tank / air filter is coming off for full strip and clean tonight and will get the front roller and adjuster off next week when I can move it on to the bench.
Wrispin, if you do have the F15 and carb manual I would really appreciate it.
For general amusement - why weld a crack in the chassis panel when you can weld it to the engine deck! Genius (cretin)
The bad fit of the height
The bad fit of the height adj mechanism may be due to the omission of a spacer at each end of the cross shaft.
Herewith the F12 manual.
https://www.dropbox.com/s/z68ejb7mhrwec9v/Villiers%20F12%20Sloper%20eng…
and the Auto Certes front roller and height adjuster mechanism
https://www.dropbox.com/s/65wc7v29t736c1r/Ransomes%20Auto%20Certes%20fr…
Perfect! thanks very much.
Perfect! thanks very much.
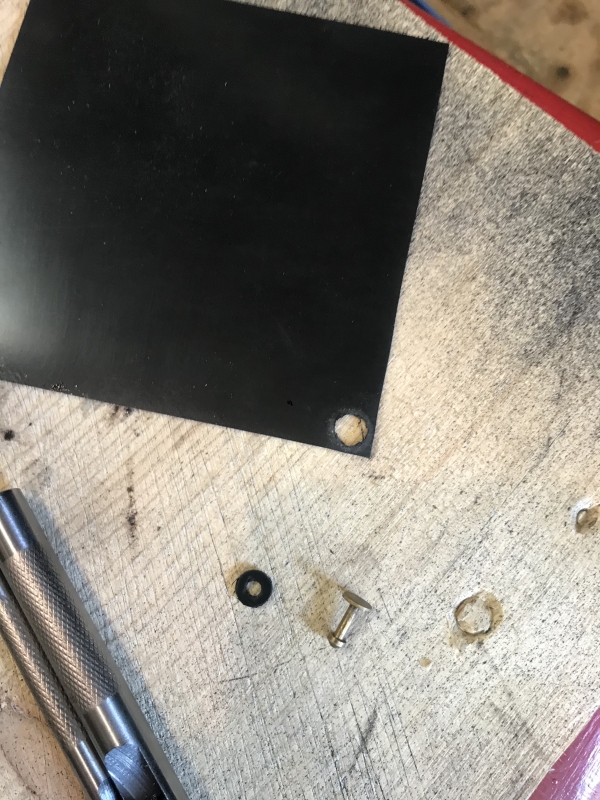
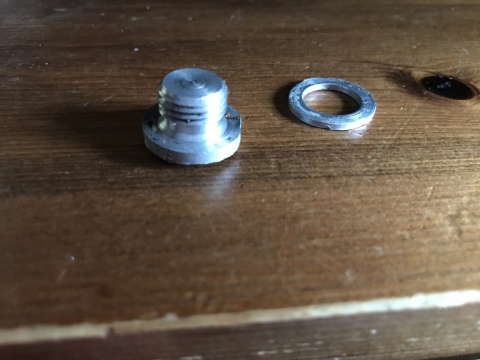
Has anyone replaced the float bowl push button rubber gasket seal? Wondering if these can be purchased or if I need to make one our of suitable material?
I've bought some of this to
I've bought some of this to make a new push button seal. If it works out I have enough for 100 more :-)
https://www.ebay.co.uk/itm/HIGH-TEMPERATURE-FUEL-CHEMICAL-RESISTANT-VIT…
I assume that you are
I assume that you are referring to the carb bowl drain valve. The washers and complete valve kits are available for not much money. However, now that you've sourced the material it will be interesting to see the result.
Yep, I reckon with a hollow
Yep, I reckon with a hollow punch 2mm ID and around 6mm OD it should work fine with Viton of that grade and thickness. The one that was in there was in bits even before the ultrasonic bath.
Gave the air filter case a
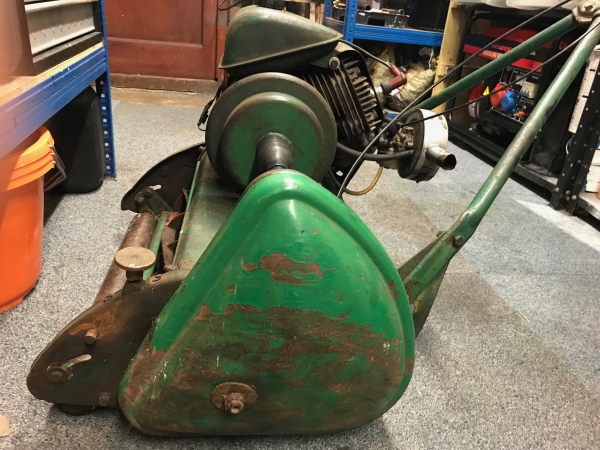
Gave the air filter case a lick of paint and offered up the carb as I need to make a new gasket for it, the old one in picture is a mess. The filter case is very misshapen and does not sit flush with the carb at all, so I need to straighten that out. The airfilter had the round paper filter and a piece of foam filter fitted as pictured, although the sloper started right up with a clean plug and fresh fuel, plug condition was looking very rich.
I appreciate this bitsa setup is a bit of an unknown, but appreciate opinion. Dispense with the foam filter piece and just use the paper one? Fit a new filter case for foam filter like my Suffolk 43? or finish the overhaul and see how it runs?
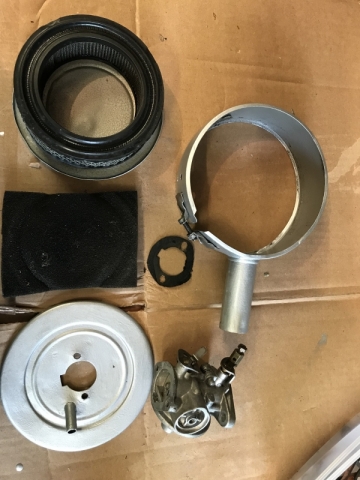
I'd just see how it runs. If
I'd just see how it runs. If it is a diy modification and it continues to run rich to the extent of causing a problem it may benefit from a change of main jet/emulsion tube. Hopefully, someone will confirm, or otherwise, as to whether the Dellorto is an official mod - I suspect not, as I have a spec sheet for the very last version of the F12 - the A15 Super Sloper which has an air filter similar to yours but with a Villiers Junior slide carburettor.
https://www.dropbox.com/s/59ago9ve91bxhcu/Villiers%20A150001%20-%20Copy…
Thank you Wristpin, I have
Thank you Wristpin, I have added that spec sheet to my now burgeoning folder.
I can't get it onto the bench until mid next week for the proper dismantle - but I can't stop fiddling.. The fuel tank is in great nick internally, the 11mm bolt underneath attaching to the engine is in a daft place to remove :-) I don't think the recoil is original as only 3 screws align with the housing, but it works well enough. The grass deflector is rotten, more holes than a tea bag, may put something in the wanted section but down the list of priorities for now. Emailed The guy who did a good job on my last cylinder, wants £30 for cylinder, bottom blade and paint - no brainer!
I agree with you about that
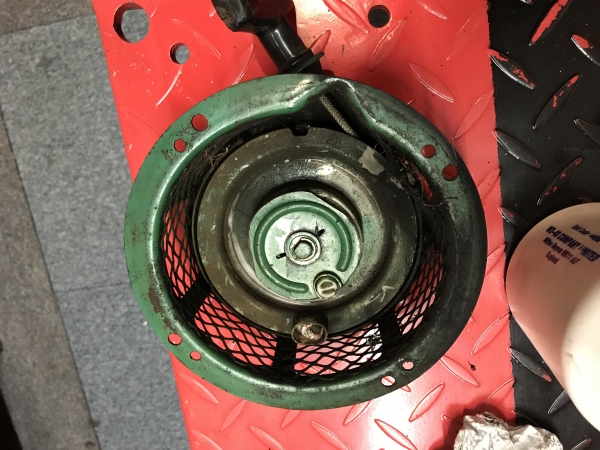
I agree with you about that tank retaining bolt - I have a "special" spanner that makes it a lot easier. I also agree about the starter, it's not one that I'm familiar with and I don't recognise it from any other Villiers engine; perhaps another OLC member will recognise it.
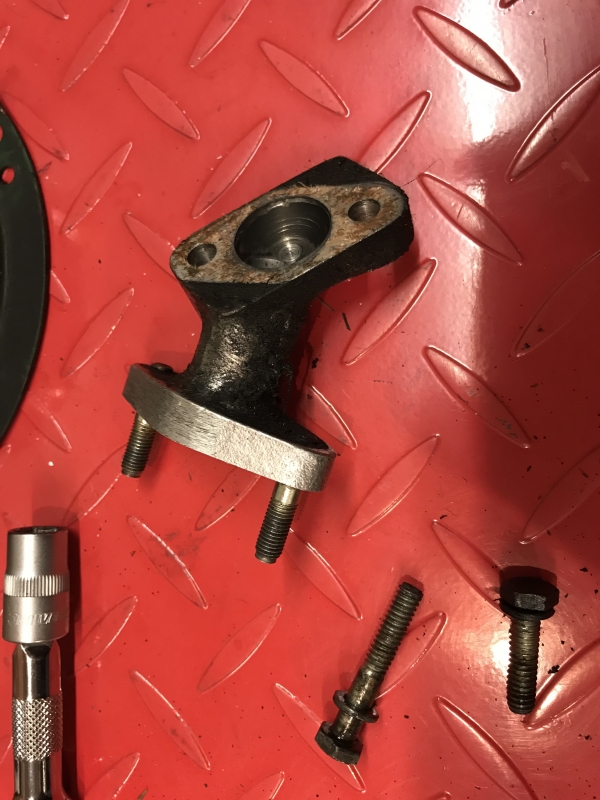
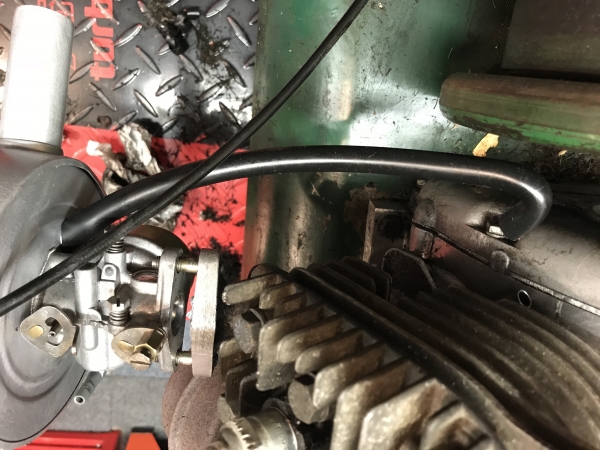
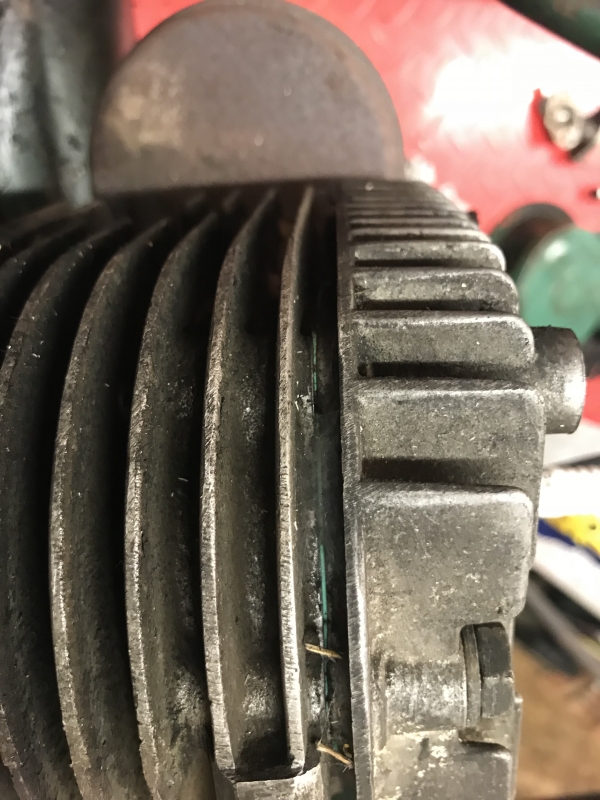
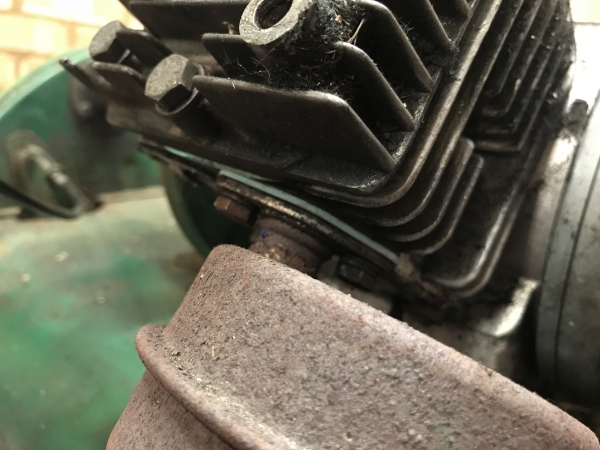
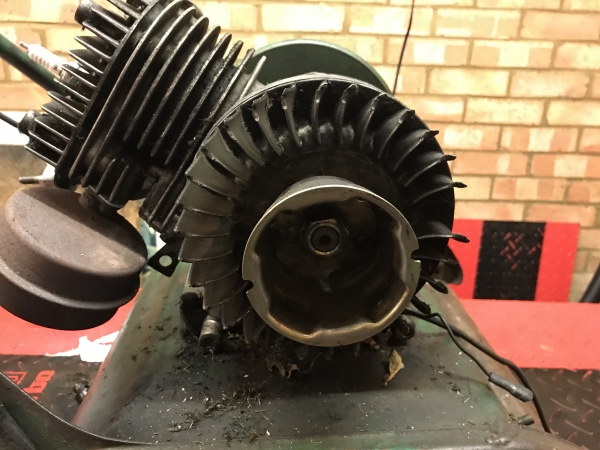
Can you post an image or two of the inlet manifold and how the Dellorto is grafted on? Also, it looks as though the usual Sloper breather is missing from the front of the engine and there is a breather pipe from out of the valve chest running into the air cleaner - is that correct? Looking at one of your semi overhead images there is no sign of the normal breather or where it would be, so your engine would appear to have crankcase side cover to match the repositioned breather; hardly a DIY mod.
I will have it on the bench
I will have it on the bench later today and will take some better pictures of manifold / breather / recoil.
That under tank bolt was a real head scratcher :-) I managed to find an ancient "king dick" ring spanner with a mild enough swan neck to fit, if it weren't fpr that, like you I would have had to fashion one to fit!
Without a suitable spanner,
Without a suitable spanner, it is necessary to remove the flywheel to gain access
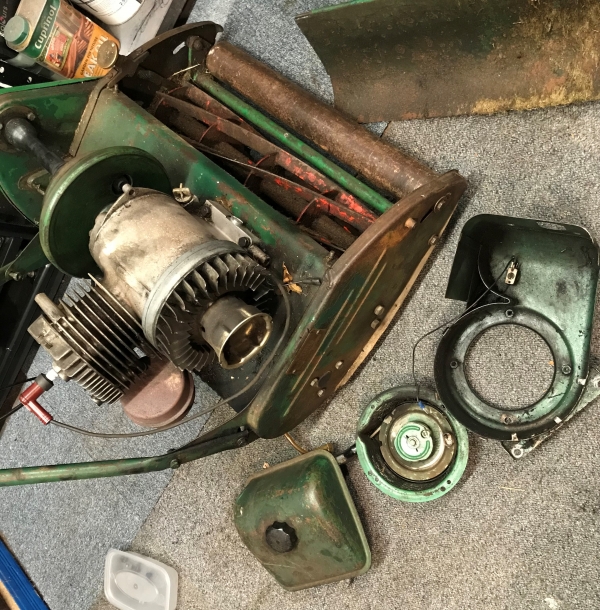
Now I have it on the bike
Now I have it on the bike lift (ideal for this sort of thing) some observations..The engine deck is filthy, oily filthy. I cannot see any obvious oil leaks.
The head at least has been off recently I would say, clearly newish gaskets to head, inlet and exhaust manifolds. The bolts on both manifolds, which can be hard to undo on a motor, came off with the mildest push on a spanner!
The good news is that Wristpin has identified the engine to be one of the last designed Villiers Slopers (A15) so breather, carb and airfilter arrangement are likely to be correct and positively look so now on the bench.
Any ideas what the head bolts should be torqued up to? I don’t trust it seeing how loose the manifold bolts were.
I will take some pics now
Pictures of the breather,
Pictures of the breather, inlet, carb arrangement (I hope)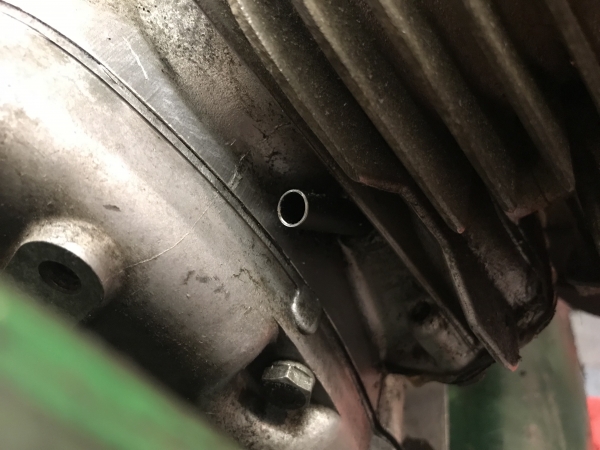

New Gaskets? - any advice on
New Gaskets? - any advice on torque appreciated especially the head.
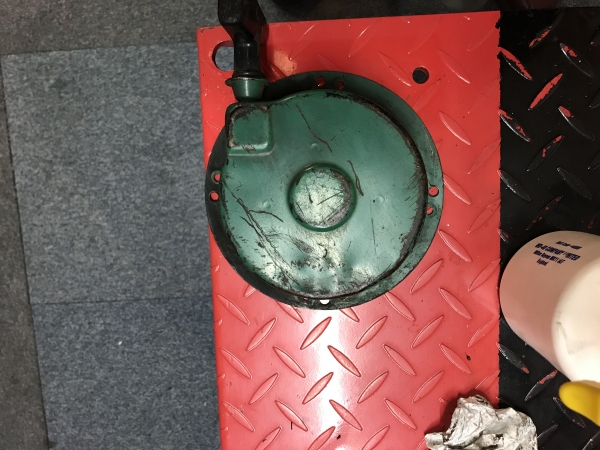
Recoil, any help on
Recoil, any help on identifying this as original equipment or not? appreciated
Torque. All in lbs ft
Torque. All in lbs ft
Head bolts 12
Big end 8
Flywheel 30
Crankcase side cover 9
No mention of manifold but as they are the same diameter as the side cover ones, maybe 9. I would just pull them up tight with a short spanner.
Valve clearances for an F12 Sloper are 6 thou for both the inlet and exhaust so probably OK for this one.
Ignition. I'm guessing that being such a late example it may have electronic ignition, so no points to worry about.
The wee viton sheet arrived
The wee viton sheet arrived today to make the float bowl drain gasket, 7mm OD & 3mm ID in the unlikely event someone will do the same :-) I have enough for another 100 mind... Its been holding pure alcohol which is thinner than petrol for hours without a drop so thats worked a treat!
Thanks for those numbers
Thanks for those numbers Wristpin, head bolts were well over 12, I will pull up the manifold bolts as described.
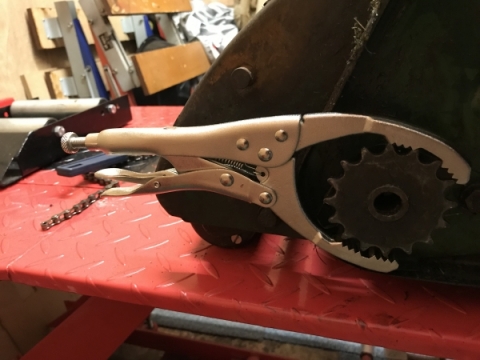
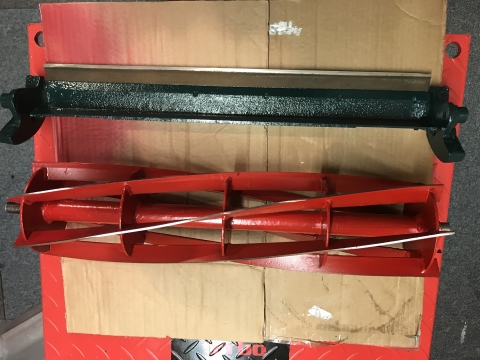
Had a go at dropping out the
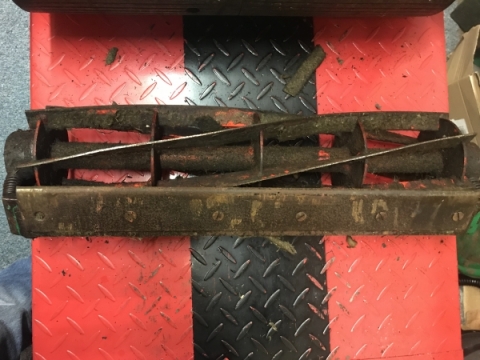
Had a go at dropping out the cutter until for overhaul. Old hat for the experienced I would assume but I found the cylinder drive sprocket quite difficult :-) so posting this for interest..First I tried a cheapo oil filter chain wrench which was laughably inadequate, then a grip type oil filter wrench which I could not get enough purchase on and was liable to slip and damage the sprocket, remembered I have a clutch hub holding tool and this worked really well, same as this off ebay -> https://www.ebay.co.uk/itm/Universal-Clutch-Hub-Holding-Tool-for-ATV-Mo…
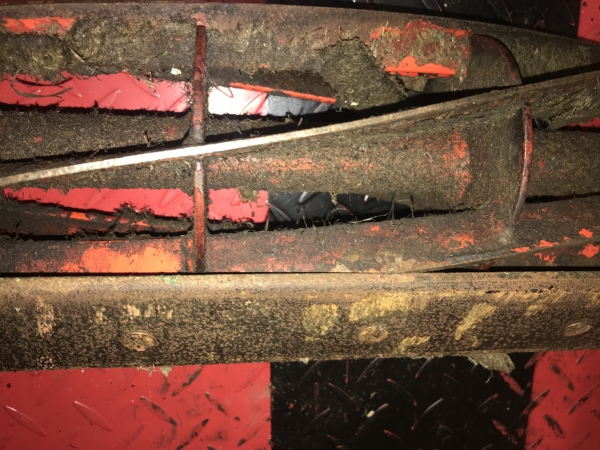
The cylinder barely turns by hand as it has been adjusted down to the extent that it contacts the bottom blade, taking the cutting unit apart tonight for sharpening & paint next week. I hope the blades are not damaged too badly?
The cut height adjuster was not working because the front Certes roller unit was so clamped up it was fixed in place. Its working now but the whole thing needs to come apart as the front roller does not turn and spacers etc might be missing.
Few pics of sprocket tools and cutter unit
That's an interesting tool
That's an interesting tool but I think that it will have met its match when it comes to the rear roller sprocket!
This is cylinder sprocket tool that I made about forty years ago and has probably undone more Marquis and Morrison sprockets that I've had ....... !
Plenty of leverage!
That is top trumps :-) and my
That is top trumps :-) and my 2nd defeat of the day.. !
Of all things I was surprised that I could not get the blind side bearing carrier off the cylinder and called it a day in case I damaged something or myself. It turns fine, comes out so far and even wobbles around but I'm bxxxxrd if I can get it to come off. Its as if there is a lip stopping it coming off. I thought it might be vacuum from the grease which it was well packed with, but even after removing the grease nipple and digging out some grease it was no easier - best to walk away and have another go tomorrow...
Don’t mess about, give it
Don’t mess about, give it some welly! 24” tyre levers!
That made me smile :-) - "get
That made me smile :-) - "get on with it"
Put the cylinder between 2 old carpet tiles and sat astride on garage floor, crow bar carefully placed and it popped off in a jiffy :-)
Cut height mech and front roller next, so much mess, so much fun..
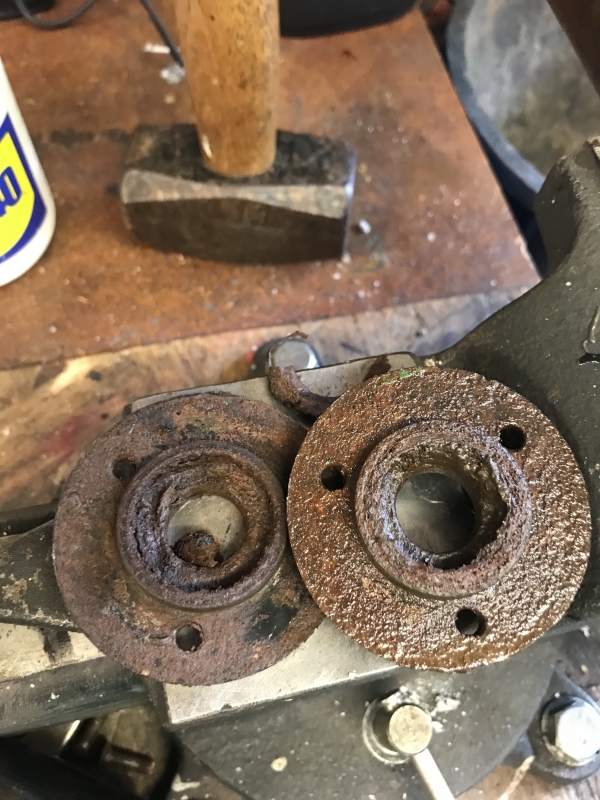
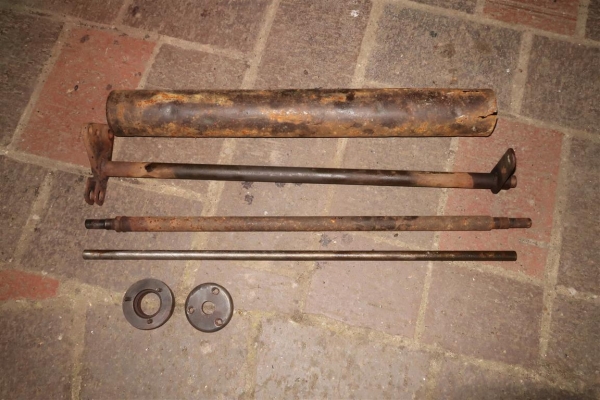
I have the screws off both
I have the screws off both ends of this Certes front roller, but the ends are not coming off, is there a knack to that, are they in fact threaded on? Can't tell from the diagrams.
I begriming to wonder if it is worth it, the roller grinds and binds on the Centre rod, and something is rattling around inside, I think a bearing has disintegrated and little ball bearings are loose inside. This roller maybe more trouble than its worth.
Has anyone got a working or fixable Marquis 20" A4 front roller, or a Certes 20" front roller? Will put something in the wanted section in case. I have the certes height adjuster as well, not sure if that is compatible with the Marquis front roller setup... Not a good day :-(
EDIT: perservered and got the
EDIT: perservered and got the ends off with back and forth on the oil filter wrench. Rubber bush at either end holding the spindle, might try tapping the spindle out... nothing like the diagram I have for the Certes roller.
EDIT: Fixed it, rolling front
EDIT: Fixed it, rolling front roller :-)
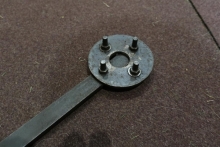
SNAP ! Just pulled one from
SNAP ! Just pulled one from the scrap pile to show you how it comes apart!
You still need to get the pivot shaft out of the roller carrier yet!
Invaluable, thank you very
Invaluable, thank you very much for the effort in showing that, I owe you one or several really...
I have made progress today with the few hours I had, and moving on to some smaller things.
Need to replace both control cables, is there a good place to call for these? (was thinking local bike shop:-)
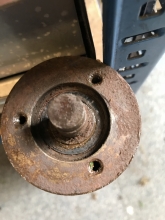
Oil drain plug. The one fitted is an aluminum slotted disk, which I got off as soon as I got it with small moles as the slot is truly mullerd, seems a wildly optimistic design if original. Are these available to replace?
Correct control cables will
Correct control cables will save a lot of messing about. John Cruse at the Hailsham Mower Centre can probably supply new old stock or accurate reproduction ones. 01323 842477 themowercentrehailsham.com He has a regular ad on the back cover of Grassbox
I don’t recognise your description of the oil drain - image please. The older Slopers just had a small square head bsp plug.
Edit. Just looked back at one of your earlier posted images and can just see the drain plug that you are referring to . Just a wide headed screw, probably with a fibre washer under the head.
Thanks for that wrispin, I
Thanks for that wrispin, I spoke to John and he makes the throttle cable to order given differences in carb and has the clutch cable as they are stock items. I asked about a replacement sump plug while at it and he described the exact same aluminum slotted one, so it appears this would have been fitted as standard - albeit with an undamaged slot..
Hello, I'm trying to source
Hello, I'm trying to source the correct equivalent NGK plug for this Villiers. The F12 book states Champion N8, a quick google throws up B6ES, fitted is a B6HS - The difference in the E and H refers to thread reach. E being 19mm and H being 12.7mm (half inch) - I would guess the shorter B6HS is correct?
I can still get the Campion N8 at x4 the cost if that would be more advisable as I'm hoping to have nailed this rich running which may have been caused by carb / extra foam in air filter.

If the cross reference states
If the cross reference states B6ES then that is the plug that I would advise using, the important thing to do is to compare the thread length to the plug removed (assuming the correct plug was fitted of course) If a plug with a shorter reach is fitted the plug will be shielded as it will not be at the full depth of the threaded hole. Another thing to take care over is the temptation to fit a plug with an extended nose as this could foul the piston and cause damage.
If you are unsure about the length of plug to fit you could take some time to check the length of thread in the plug hole and compare it to the plug that you intend using.
Well I am damn glad of that
Well I am damn glad of that advice and a wee bit surprised, I would have assumed smaller reach which was fitted, but having measured and inspected the engine thread length it is clearly the longer 19mm B6ES required. Previous doofus had the wrong plug fitted which would attribute to the unclean cylinder burn, will try and put the vac on the thread to pick out all that soot before putting in the correct plug!
Thanks a lot.
Strictly speaking, a B5ES. It
Strictly speaking, a B5ES.but a lot come my way with B6ES.
Go one hotter with a 5 you
Go one hotter with a 5 you say? Cheers
If the book says 5, stick
If the book says 5, stick with it. Before you go any further I would get the valve seating and clearances correct - they are the difference between a running Sloper and a sweet running Sloper.
The book I have said Champion
The book I have said Champion N8, the equivalent search result I got was NGK B6ES. I will go with 5.
Thanks for the advice on valves, will check and adjust and check seating.
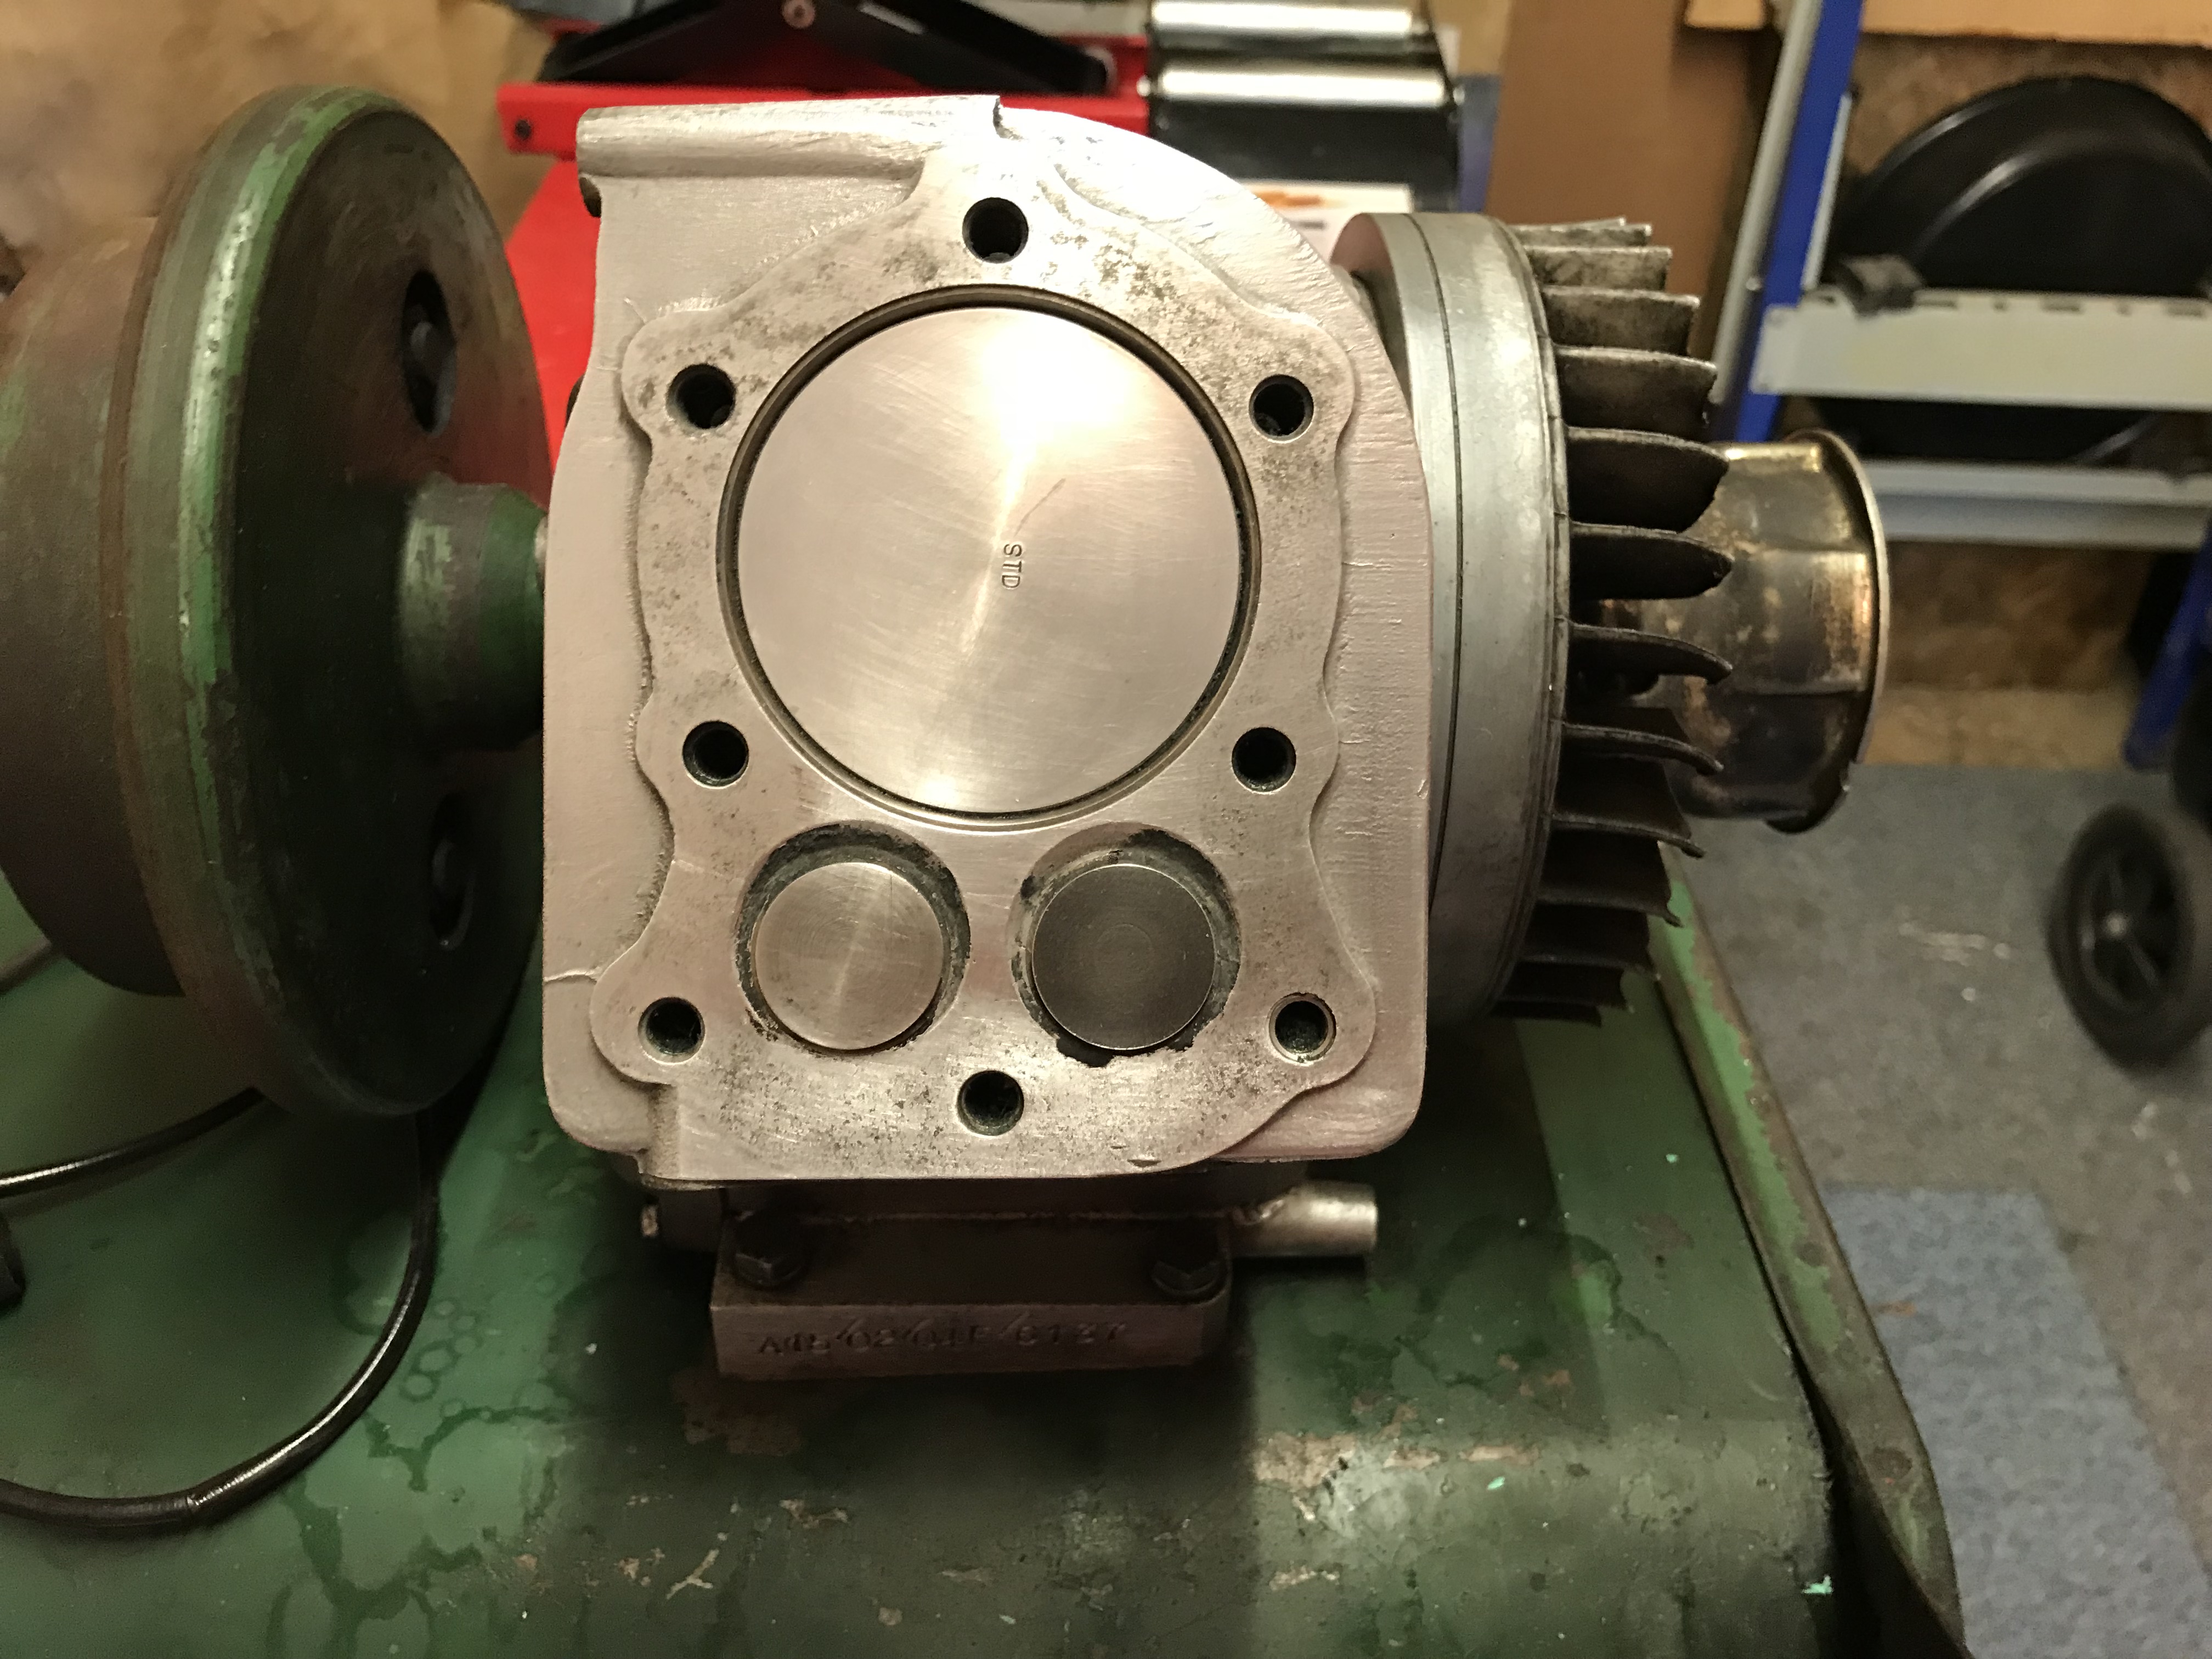
Removed the head, fair bit of
Removed the head, fair bit of carbon but bore looks good. I will decoke head, piston crown & ex port. I am getting .006 IN and .008 EX, inlet is spot on. I have ordered a valve spring compressor which I hope will fit...! Will then remove valves for checking and help :-)
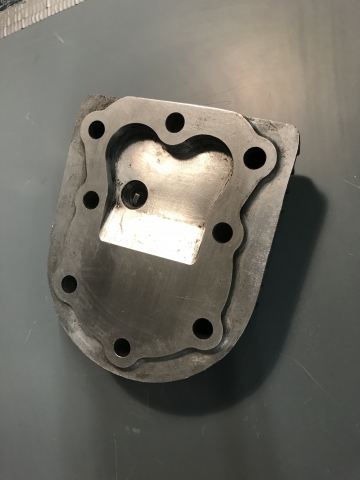
The valve chest cover had a fair amount of RTV silicone applied around the bottom edge, the rectangular gasket does not look great and could have been an issue..
Found a NOS gasket set for less than 10 on ebay
Many thanks
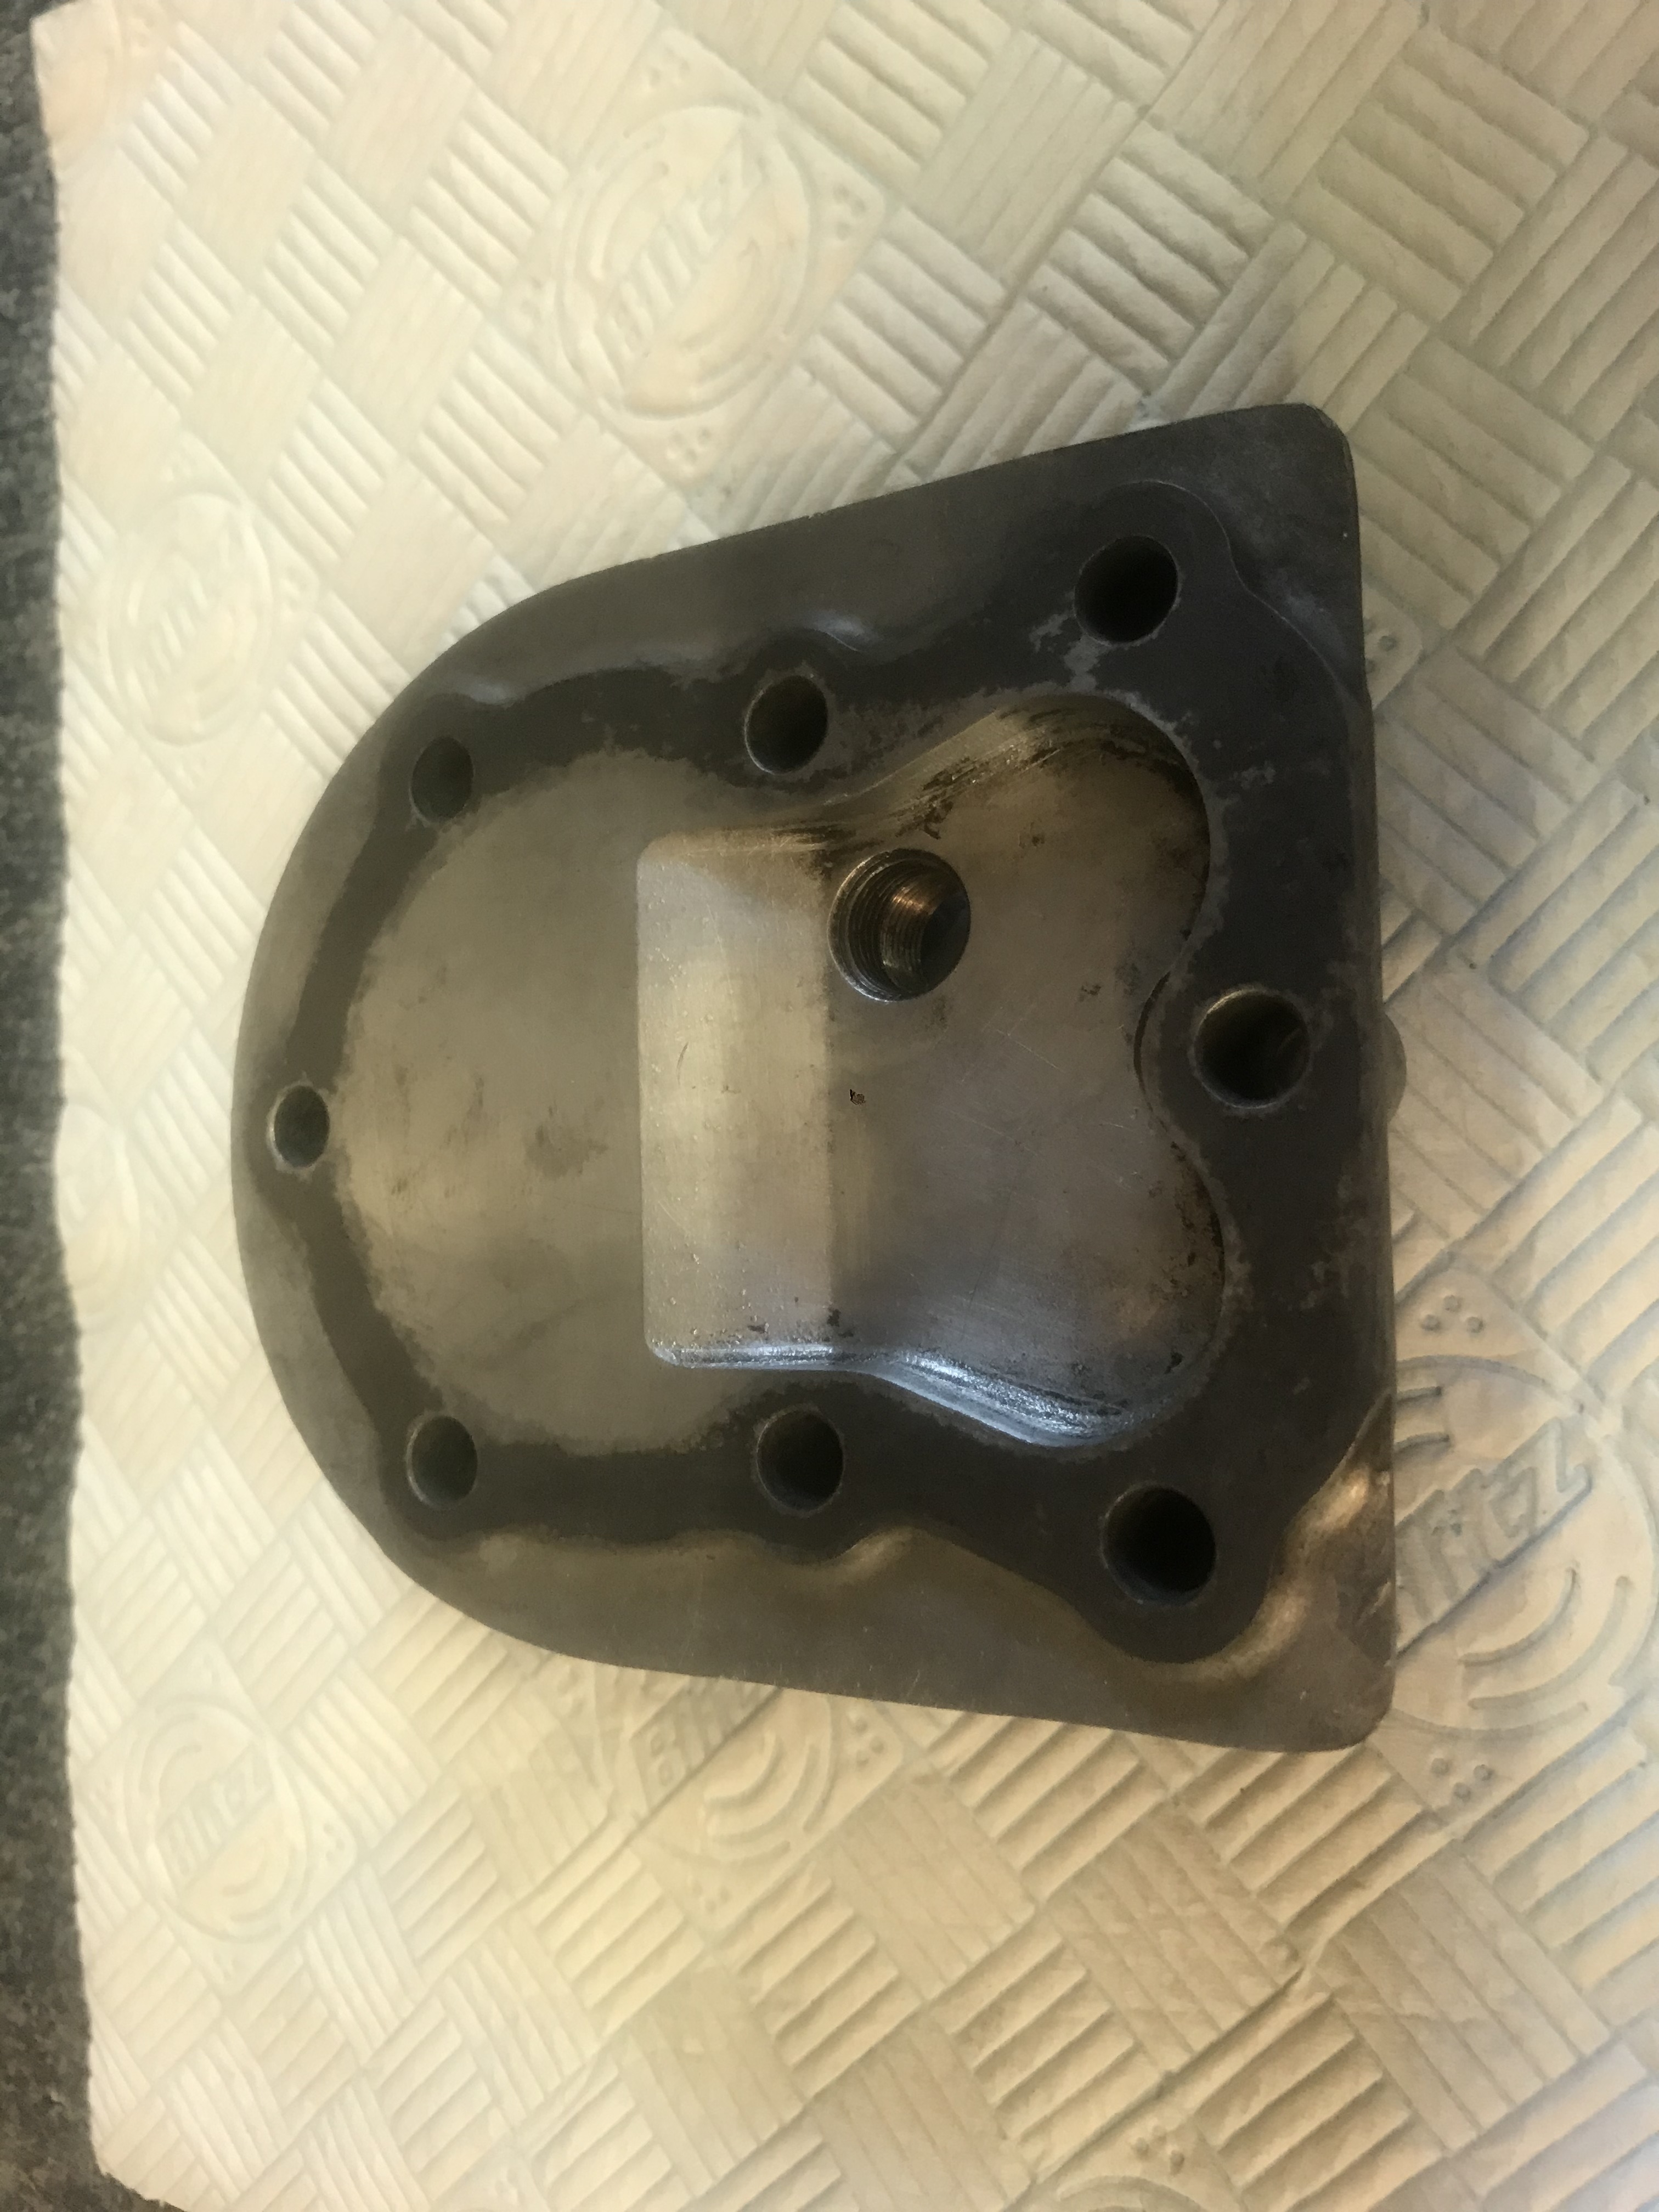
The valve chest covers tend
The valve chest covers tend to get distorted and it's worth truing them up. Rubbing over a sheet of emery on a flat surface will do the job. I've got a piece of half-inch thick plate glass as a diy surface plate.
It is - and will do! :-)
It is - and will do! :-)
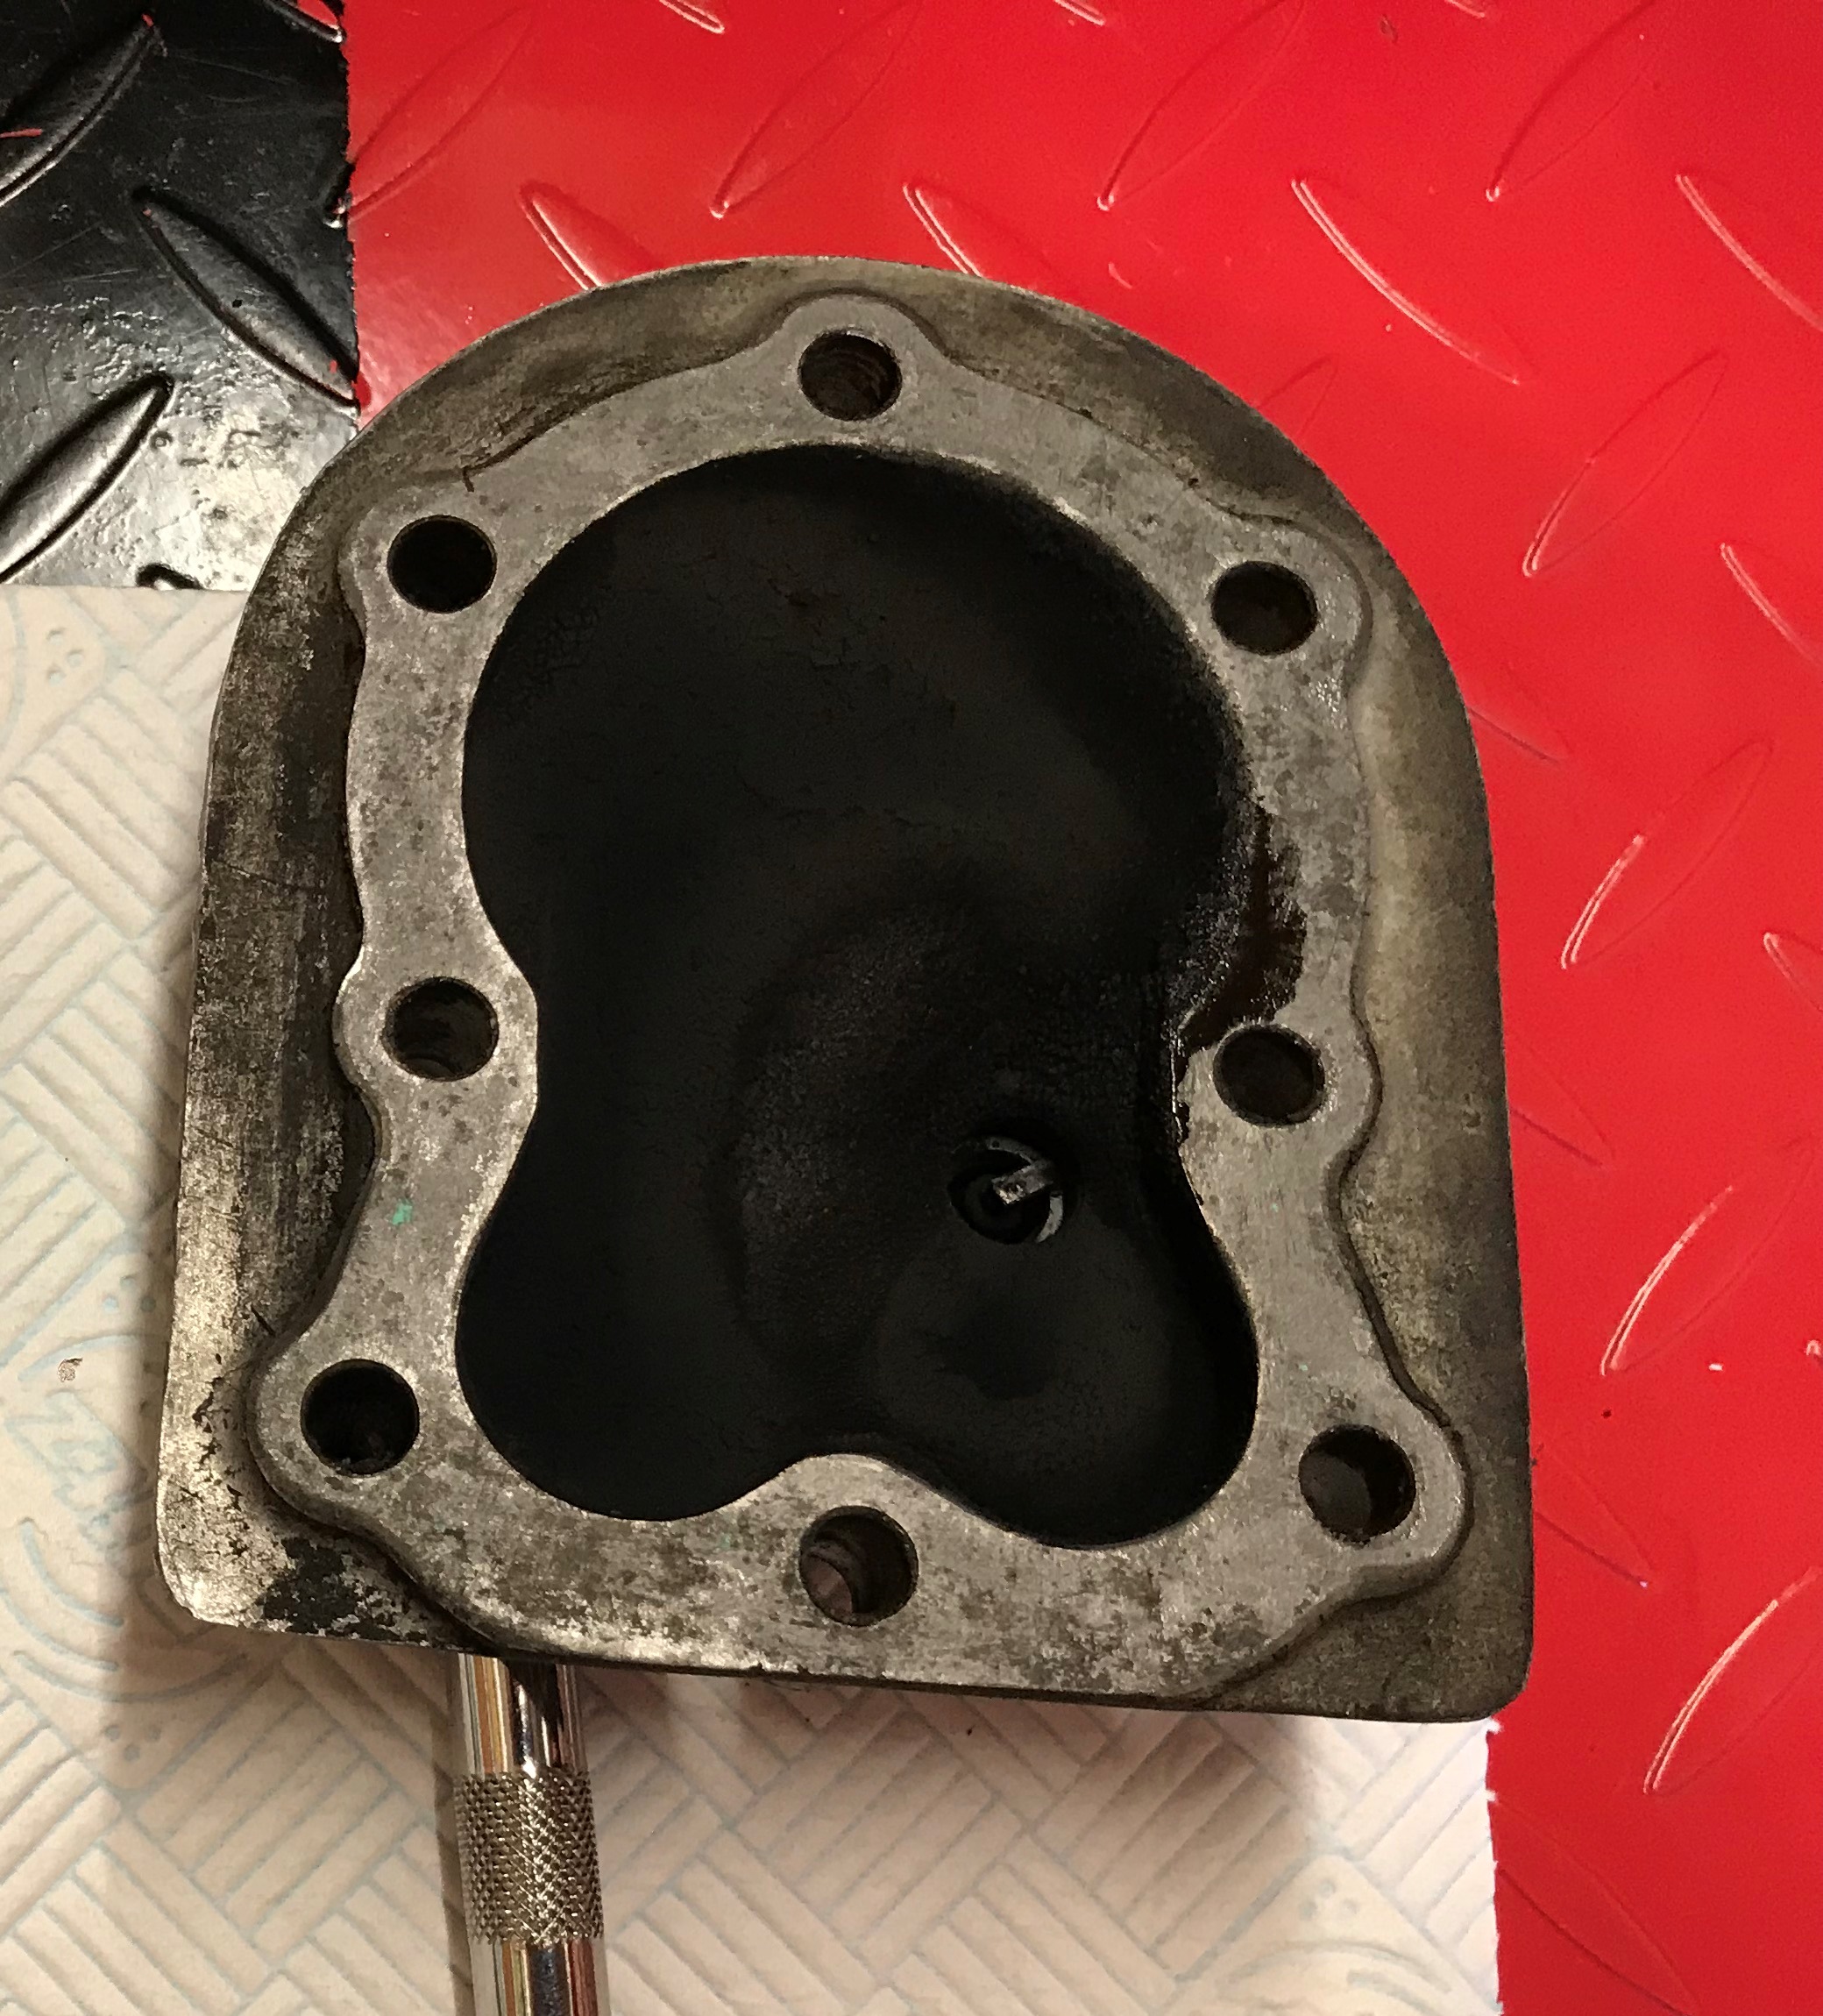
The gasket was a pig to get
The gasket was a pig to get off, some of the coked up areas were pretty hard baked too, used nothing aggressive, just isopropyl and fine grade scotch bright - even tho the book says to use wooden scrapers. I won't do anymore around the valves until I can get them out.

Surface plate again for the
Surface plate again for the cylinder head. Fine emery and lots of lube - paraffin or kerosene.
That would be paraffin in
That would be paraffin in England wristpin :-)
The valve chest cover was shaped more like a canoe, managed to get the outer edges straightened up in a big vice with some flat bar to true in the jaws, then got it on the plate and finished with some 80 to 400, million miles from where it was but not sure I trust it yet. The chest cover seating surface was in good shape once all the RTV was removed (pain in the..) so with a new gasket hope it will be ok.
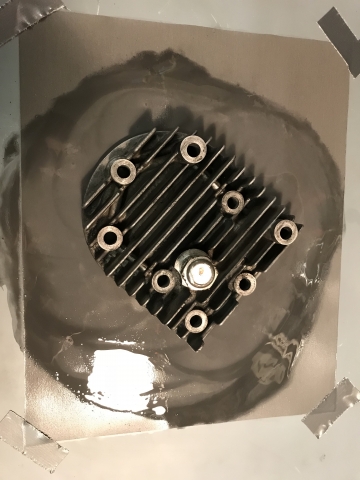
Went through 600, 800, 1200, 1600 finally 2000 on the head, if this seeps torqued up with a new gasket I will be very surprised.
Gaskets arrived, still waiting for the valve spring compressor.
Still waiting for the valve
Still waiting for the valve spring compressor.....
Picked up cylinder and bottom blade, £30 very happy with that.
So, what engine and what carb
So, what engine and what carb? The Marquis name spans a good few years and several engines.
Even better a few images.