Suffolk colt cylinder removal
I've been looking on the site for a guide to removing the cutting cylinder on a Suffolk Colt prior to sharpening.
I may have missed it but if not can anyone help? Pictures would be appreciated!
Thanks in advance!
Forums

As Wristpin says, everybody
As Wristpin says, everybody seems to call all Suffolk machines a Colt, but there were Colts, Punches, Super Colts and Super Punches amongst others, so unless the frame sides are made of aluminium, we are going to need a picture. If they are made of aluminium, then you don't actually need to remove the cylinder to get it ground.
Sorry for the delay! Here are
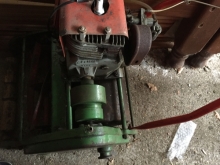
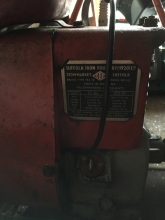
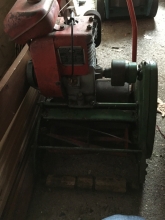 Sorry for the delay! Here are images:
Ok, looks as though you have
Ok, looks as though you have one of the original "cast iron" Colts. I would start by taking the engine and handle bars off - not strictly necessary but it makes the machine far easier to handle - particularly when it comes to reassembley.
Remove the chain case on the left hand side.
Remove the chain.
Remove the sprocket retaining nut - left hand thread.
Remove the sprocket - pull off.
Support the cutting cylinder , under the thicker diameter
Drive out the mills pin with a punch.
Remove the deflector plate from behind the cutting cylinder. A slot head screw at each end and pull upward.
On the right hand side remove the nuts from all the chassis tie bars.
Remove the hex head screw that ties the chassis side plate to the bottom blade carrier / sole plate. Also remove the similar screw from the LH end.
The RH chassis plate is then ready to come off and is only being held by a dowel pin situated just to the rear of the hex head screw that you have just removed. At this stage a good squirt of penetrating fluid al between the chassis and sole plate and around the dowel pin will help. Wiggling the chassis plate may help but remember that you are dealing with two cast components. If you turn the complete chassis onto its left side you can insert an old screwdriver or small pry bar between the right hand chassis plate and the sole plate to ease the pin out - it should free off from the sole plate and remain in position in the chassis plate. As you've already removed the screw holding the LH end you can then do the same there to free off the sole plate.
With the RH chassis member out of the way the cylinder may be lifted clear.
Note the position of the bearing races and cones . The drive end cone is a fairly tight fit on the shaft and unless worn to the extent that it will have to be changed, leave it alone. The RH cone should be a sliding fit on the shaft and is kept in tension by a large spring or thackery washer . Whoever grinds the cylinder, dependent on their type of machine , may need those cones. If the bottom blade still has a reasonably thick front edge, take that along and get it skimmed . Only remove the blade from the sole plate if it is to be renewed.
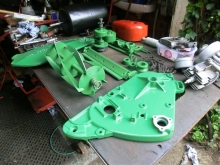
Reassembley, as they say , is the reverse procedure!!!!
A week ago I had a similar machine on the bench and could have included some pics!!
The name Colt has been used
The name Colt has been used and misused for a long time so an image of your machine will ensure that you get relevant information.