Ransomes Auto Certes
Just bought a Ransomes Auto certes and I am restoring it. It has the Norton Villiers F12 engine and I have a few questions.
Mower was bought as "won't start" but I found that the exhaust valve was stuck open. This freed off easily so no problem there. There is a weak spark when flywheel is turned over by hand, but thei may well be ok on the pull starter when replaced. However i am wondering if I can check the points essily and if so, what needs to be removed and will I need a special puller.? Carb needs a new float needle and main jet tubular filter, which is essential as jet has a hole not much bigger than the sharp end of a needle. Are silencers available for these mowers or do I make a new one?. I have all the tools to do the job so that does not scare me. Is a service manual for the engine on line anywhere ?
This is a good mower all round and does not look like it has done much work, so well worth restoring. I worked in the lawn mower shop for five years from 65 to 70 and well remember the chap who built the hand Certes, a Harry Pitcher, who lived north of Ipswich in Tuddenham, where I lived, and I often gave him a lift to work. Good days and a great bunch of guys in that factory.
Forums

Flywheel is now off but…
Flywheel is now off but noticed that one fin is missing from the flywheel. Not sure what to do with this yet. Might be able to get a slice of alloy tig welded on to the stub. I don't think it will affect the balance any, but would like to fix it if possible. Can't grumble as only paid a pittance for the machine anyway. What is torque setting for these engines, bearing in mind the alloy crankcase. I have had to helicoil one of the holes so far as a previous owner had bodged in a whitworth bolt that was only holding on the bottom threads as upper threads had stripped out. Contact set /coil look brand new, so some luck today.!!
Mike.
Not unusual to find a broken…
Not unusual to find a broken fin.
I think that you will find most of the information that you need on this site but for a start
Head bolts 12ft lbs ft, big end 8, flywheel 30, end cover bolts 9.
The Villiers F12 engine is…
The Villiers F12 engine is now stripped down and looks to have been rebuilt very recently with new +.20 piston and rebore. All bearings and bushes look to be new. Bit of luck all round I guess. Only one point is the use of Hylomar or similar sealing paste. See photo as to reason I never use it. It tends to break off inside and can seriously clog up any oil holes or other important small items. I only use Wellseal which works fine for me and Rolls Royce apparently. Mike.
photo showing sealing in…
photo showing sealing in side engine case.
Crankshaft now measured and…
Crankshaft now measured and is within factory limits. Good. I have also removed bottom blade with the aid of an impact driver. All screws came out which is a change from an old Atco I was working on some years ago. The blade as fitted is very flat with no lip, so either it has worn the raised lip off or could it be one of the "scraper " blades. Why were they fitted ? I will take photos later top side and underneath. While I was at RS & J I only came across the normal lipped blades. These were sent to us in bulk , as were the spiral blades for the cutting cylinders, from Tyzacks. The twists in the spiral blades has to be very accurate as the collars that supported these blades were first welded onto the shaft and then blades slipped in afterwards and then they were welded. I spent a few days working out helix angles for a particular mower where they were having trouble fitting the spiral blades and found it was due to the fact that when they calulated the twist, they had not allowed for the small angle that the blade went through as it passed through each collar.
I have to make a silencer for the Certes and am considering a rudimentary press tool to press out each side, which I will then spot weld together. Should be quite a straightforward job. I hope !!.
By the way, I managed to get…
By the way, I managed to get a copy of the F12 maintenence workshop manual from the Villiers man in Braintree, Essex. Very good comprehensive booklet and not expensive.
Mike.
Is there any advice on…
Is there any advice on sharpening the Certes shaver blade, before I replace it on the machine? I have been checking the rear rolls and one of the grease/oil nipples is missing, maybe broken off. Are these press fit or screw in ? I might be able to remove the bit which is left with a long easyout but will have another look tomorrow.
mike.
Grease nipples look to be…
Grease nipples look to be press in type and I might have some somewhere, a legeacy from RSJ no doubt.!! The crankcase is now spotless inside and out so I am starting to rebuild the engine. One thing bothers me, the cam collar that operates the contact breaker does not have much of a cam on it and am wondering if this has worn down a lot. Can anyone give me the dimension across the collar at the cam's highest point. There are two ways of fitting the cam and only one way is correct and should be able to be worked out by TDC. (I hope) There are one or two details missing from the workhop manual, this being one of them. There does not seem to be any mention of the crankshaft thrust washers , or thickness of same.
Mike.
The standard Auto Certes…
The standard Auto Certes blade was flat with a slot machined just back from the front edge , in effect making it lipped but not in the same sense as the lipped blade fitted to a Marquis . There was an optional shaver blade for the AC but as far as I know it was for fitting by the user and not a factory fit option on new machines .
I’ve not got a cam ring or a dismantled engine to hand but I think that they are symmetrical and can be fitted either way round. In the reassembly section of the Villiers manual it just says refit the cam. No mention of any markings or particular orientation, but I’ll have a look in my “ stores” later in the week. Early F12s didn’t have thrust washers on the crank and I can’t recall seeing a figure for their thickness when fitted to later versions, or for that matter, an end float figure. Gasket sets for the F12 only contained one crank case end cover gasket so it would seem that Villiers were not particularly concerned about setting end float.
Re. building up the engine,…
.Re. building up the engine, there are only a few parts inside, before the cover
casting can go back on.
Crankshaft, conrod, camshaft, gear trough and spring,and the cam followers plus the
location dowels, if they were removed.
The gear trough spring should be fitted with open coils to the rear side of trough.
Timing dots are on crank gear and cam gear.
Re. piston fitting, I used a strip of brass around 3/4" wide and a jubilee clip
to compress the rings. Not too easy a job as the cylinder face has a step in it in
the combustion chamber area. I should have made a stepped brass ring and then it
would have been a lot easier. As it was, I eased the rings in that area and the
piston slid in ok. The original lock tab plate was pretty mangled , so made a new
one from 18 Gauge brass as I could not find any suitable steel in the workshop.
When fitting the side cover casting, care has to be taken to make sure that the
gear trough locating pins are lining up with the cover holes. Apart from that, all
pretty straighforward in that area.
Fitting the valve spring collets are fiddly and you need a spring compressor with
a very thin end. If anything else is used then that gets in the way of fitting that
small slotted disc. (In the manual they quote that part as a peg, maybe an earlier
method of fixing. As with any engine, lubricate all moving parts with engine oil
before fitting.
Mike.
I’ve not done it myself but…
I’ve not done it myself but I’ve seen valve springs compressed out of the engine and kept compressed with two thin cable ties . Once back in with their retainers in place , snip the ties. On the subject of retainers, three types have been used - pins through holes in the valve stems, key hole slot retainers and the little horseshoe retainers.
On the subject of gasket cement . New gaskets are usually assembled dry but reusing undamaged ones just need a smear of heavy grease, but Wellseal does have a lovely ( addictive !) smell !
This particular engine has…
This particular engine has the horse shoe type of valve retainers. Is there a drawing for the clutch two pin adjusting tool.? I am sure I can soon make one up if someone has the details. I am asuming it is the same as the Marquis tool.?
A photo would be handy as well.
Mike.
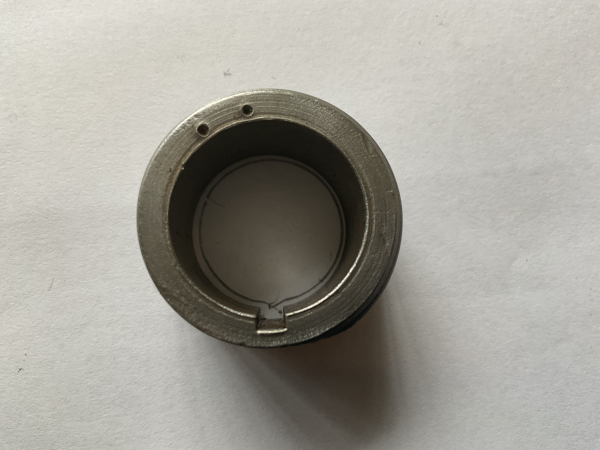
Cam ring. Found a short…
Cam ring. Found a short block with the cam ring in place. Don’t take any notice of the two centre pops at around 11 o’clock as someone had been “ playing” and there are various felt pen marks on the stator plate.
The outward face with the centre pops is smooth and the inner face next to the oil seal has a small step or relief.
If we call the key way as six o’clock the thickest part of the ring 5mm is at about 5oclock and the thinnest at about 8oclock 3.85mm. The largest diameter is between 11 and 5 and is 31.22mm.
All measurements taken with a diy quality digital vernier ( not tool room !!!)
Hope that this helps.

Cam ring. Found this one on…
Cam ring.
Found this one on a scrap “ short block”. Someone has added the two centre punch marks, but that side faces outwards. Presumably experimenting with the timing as there are various felt pen marks on the stator plate.
The inner side facing the oil seal has the raised edge.
outward facing side
Inner facing side
 p
p
As a diversion I decided to…
As a diversion I decided to have a look at the grass box. Several dents which is the norm, they can be all beaten out with care, a fair bit of surface rust that also can be treated. The two sides stamped "Ransomes" are in much better condition than the wrap round centre skin. So I am now considering replacing the centre skin or just re-make the complete box. I have a fair selection of sheet metal tools including pyramid rolls, so not too much out of the question. I then asked myself what would be involved in making new sides as well ? The Ransomes motif could be pressed in a new sheet using a two part lead mould, taken from the old box. The semi circular rib is no problem as I have a rolling tool for that purpose. The original box metal is around 025" thick , so I would probably use 18 or 20 gauge. Anyone else done work along these lines ?
Mike.
The points may be cleaned…
The points may be cleaned and set through the window in the flywheel but to do the job properly you do need to remove the flywheel and you do need a simple puller that screws into the holes provided - not a legged one that hooks around the rim which can ruin it. The flywheel can be very tight.
Carburettor parts are probably available from Jon Cruse at the Hailsham Mower Centre or from Villiers Parts.