Webb wasp restoration
 as some would know, I have a late model Webb wasp I want to restore.
i spent a night pulling it apart so I can give it a real good clean, de-rust and repaint were required. However I facing my first stumbling block, well second, if you include pinching my palm and index finger between the cylinder and bed knife......lucky it was blunt.
Anyway, my first of many questions is, how do I release the bearings from the cylinder so I can remove the fixing plate? I want to send the cylinder off for grinding and I assume they would need to be removed.
Forums

If I understand correctly,
If I understand correctly, you force it off and the washer is simply providing mechanical protection to the bearing?
Wh I click your Photobucket
Wh I click your Photobucket link this is the result:
Sorry, the requested page does not exist.
Please check the URL for correct spelling and capitalization.
Yes, with a bit of practice
Yes, with a bit of practice and care you can pivot the levers on the ends of the blades rather than the webs between them.
The use of a two leg puller may seem more gentle and less likely to cause damage but in practice the design of the bearing carriers etc can make it difficult or impossible to get a purchase.
GTC,
GTC,
its odd that it doesnt work, as im inserting the image as i have on an other thread, which works fine
Your decal thread has an
Your decal thread contains an embedded image. The thread I refer to has what appears to be a link to an erroneous URL in it.
Maybe try the embedded image process again.
GTC, you are correct, however
GTC, you are correct, however I followed the same process, it shows the photo in the sample/preview box but when I click save it shows the image as a link
Will draw this to Admin's
In that case, I'll draw this problem to Admin's attention.

Link below works:
Link below works:
The issue seems to have been caused by incorrect copying of the original link but this may be complicated by the way photobucket works. In general, it's always best to upload images directly to this site using the instructions in the guidlines or to use the Insert Link icon on the editing screen.

So, my first full weekend of
So, my first full weekend of tinkering and I'm ready for assembly. Spot rusting has been removed, two coats of epoxy enamel has been applied to all parts (was able to get an exact match due to some clean existing parts), blade and bed knife ground and new decals obtained from an eBay merchant here in oz.
I was going to begin the assembly tonight but given its 9:30 on Sunday evening and I'm sure I would not stop until it was complete.......I think it wise to stager the job over the next few nights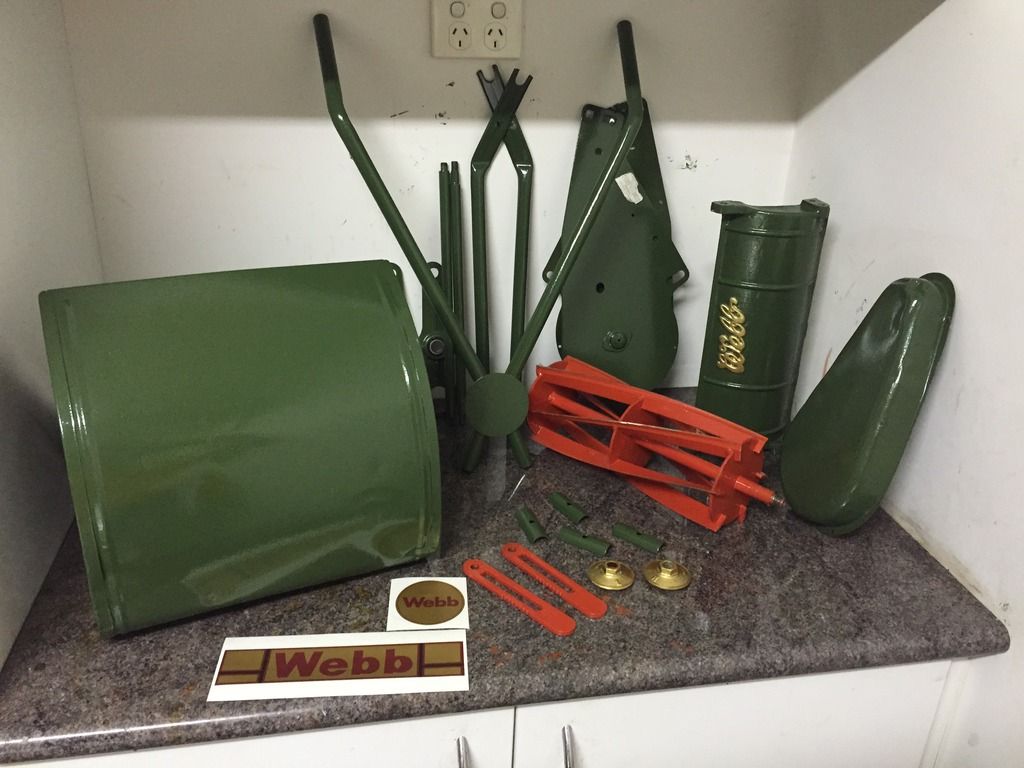

Very nice paint job and very
Very nice paint job and very wise not to rush the rebuilding process, it will be good to allow the paint to harden a while.
Thanks hillsider. Good point
Thanks hillsider. Good point about the paint. Although dry, the paint is still a little soft. We have a few days of low to mid 30's so I might let the sun bake them
That sounds an excellent idea
That sounds an excellent idea,
Re the temperature and sunshine we are currently much lower than 30 degrees and no sunshine over here!
To put a lawn mowing spin on
To put a lawn mowing spin on it, in the height of summer I am mowing my couch lawn twice per week
I am mowing my couch lawn
I am mowing my couch lawn twice per week
Now, that's what I call keen! ![]()
It helps to to only have 50m2
It helps to to only have 50m2 to mow. But it is also the price you must pay to maintain couch looking perfect during a Melbourne summer
I'm done !
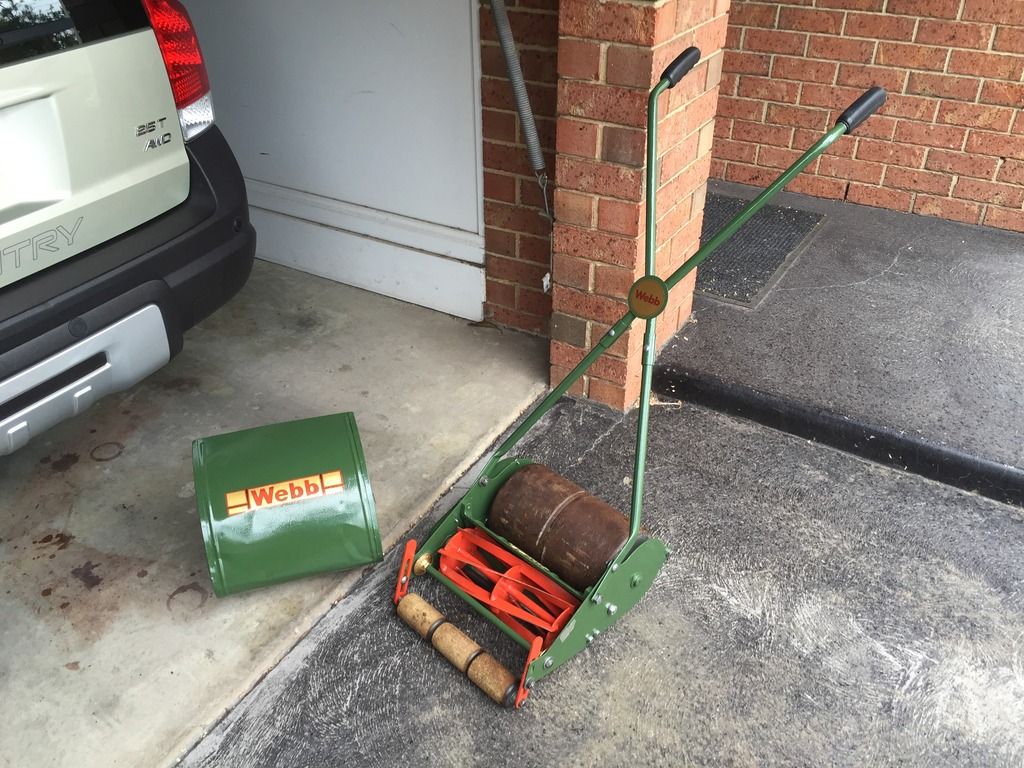
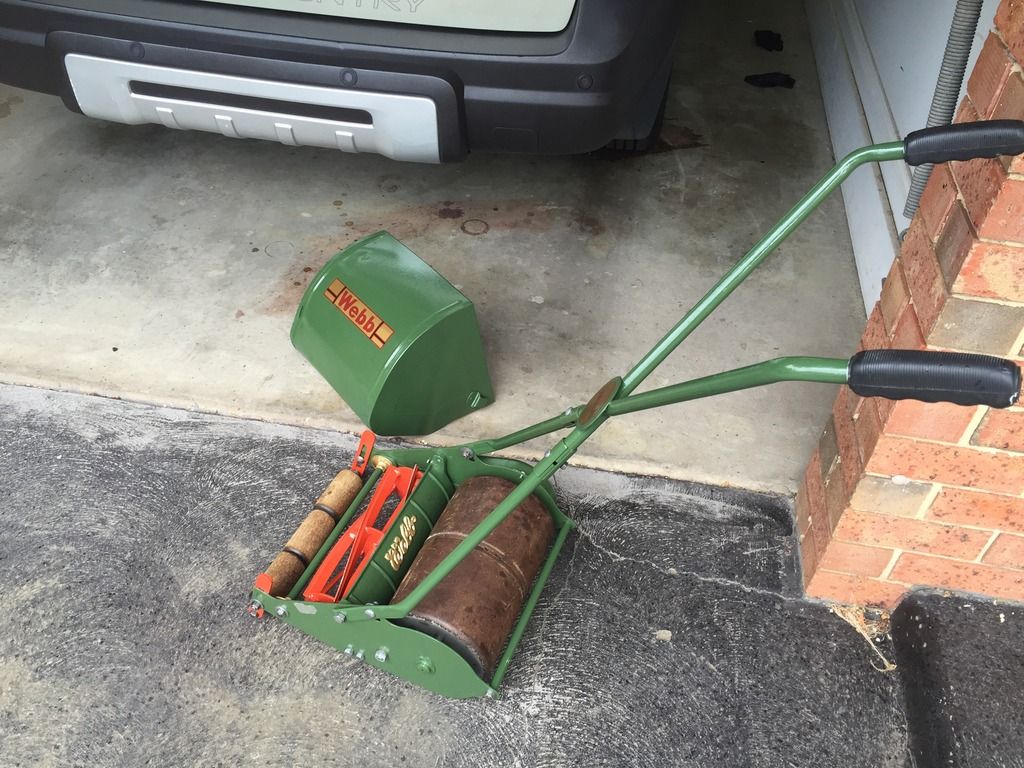 I'm done !
i was going to coat the roller with cold gal paint but chose to keep something that showed the mowers age. Very happy with the way it turned out. Only negative was that dispute 3 consecutive days of 40 degrees the heavens opened up as soon as I was ready to take her for a spin.
Good looking restoration
Good looking restoration there, I am sure that the rain did not upset things too much the paint would dry quite quickly in your sunshine.
Do you have another mower lined up for your next project?
Haha, it's been tough enough
Haha, it's been tough enough justifying this one to both my wife and mother in law. Just tonight I was asked "you spent $100 on pain and consumables, why didn't you just by a new one". I don't think the two of them appreciated me insinuating that I would rather cut my lawn with scissors than use a $150 motor mower
Couple of big tyre levers are
Couple of big tyre levers are my tools of choice but you need to protect the bearing seals etc. I've got a selection of large thick washers with a section cut out that can be slipped between the bearing and the cylinder . A good source of these is an agricultural store where they are sold for farm gate hinges etc.