Atco B17 Deluxe ... now collected
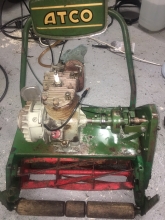
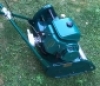
I've just returned home after collecting my new purchase, an Atco B17 Deluxe (non-runner).
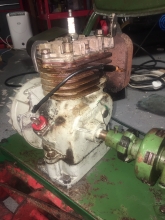
Been doing a bit of cleaning and tinkering. Nothing too much, as it's started to rain again here. It has 6 cylinder head bolts, so following the guidance given to me in another thread, I take it to be a 75G14 engine. My first observation is that I do not appear to be getting a spark, so if that's the case, I imagine I'm looking at a coil / condenser issue. Does that seem a fair assumption?
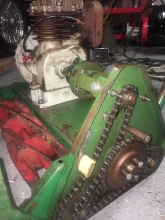
On the plus side, it seems to be turning over nicely.
Best wishes,
Darren
Forums

Never assume! However, if you
Never assume! However, if you are lucky , as H says it may only be dirty points. You mention the coil and condenser; early versions have a separate coil and condenser but later ones have the condenser embedded within the coil.
Back to your assumption that it has a 75cc cast iron block engine ; more than likely but if it is very late production it may have the A98 aluminium lump - another good reason for posting an image with your enquiry.
Thank you both for your tips.
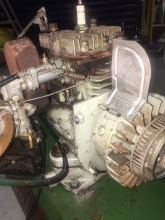
Thank you both for your tips. Hopefully it is the contact breakers that need cleaning as that sounds reasonably straightforward. Although, you perhaps have too much confidence in my abilities Hortimech, when you say that you are sure I'll "work it out". I've removed the plastic starter pulley case, but I'm not seeing the threaded holes you mention. Maybe there is something else I need to remove before seeing that (photo 7)?
It wasn't an assumption as such Wristpin, more of a tentatively put, albeit poorly worded, question. My knowledge is severely lacking, so I'm just fishing about for thoughts really.
I've taken a few photos, please see below ...
1.
2.
3.
4.
5.
6.
7.
From the photos, is this the 75G14 engine? If so, does the "75" relate to cc? Who would be the maker?
There is oil in it, but I'll put some fresh in. I've read elsewhere on the forum that SAE30 is to be used. Is that a mineral oil, rather than synthetic?
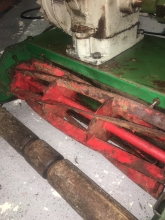
Blades look blunt to me, so I reckon on sending the cylinder off to be reground.
I'm sure I'll have a lot of other questions, which I hope you don't mind.
Thanks, Darren
Just as an update, with
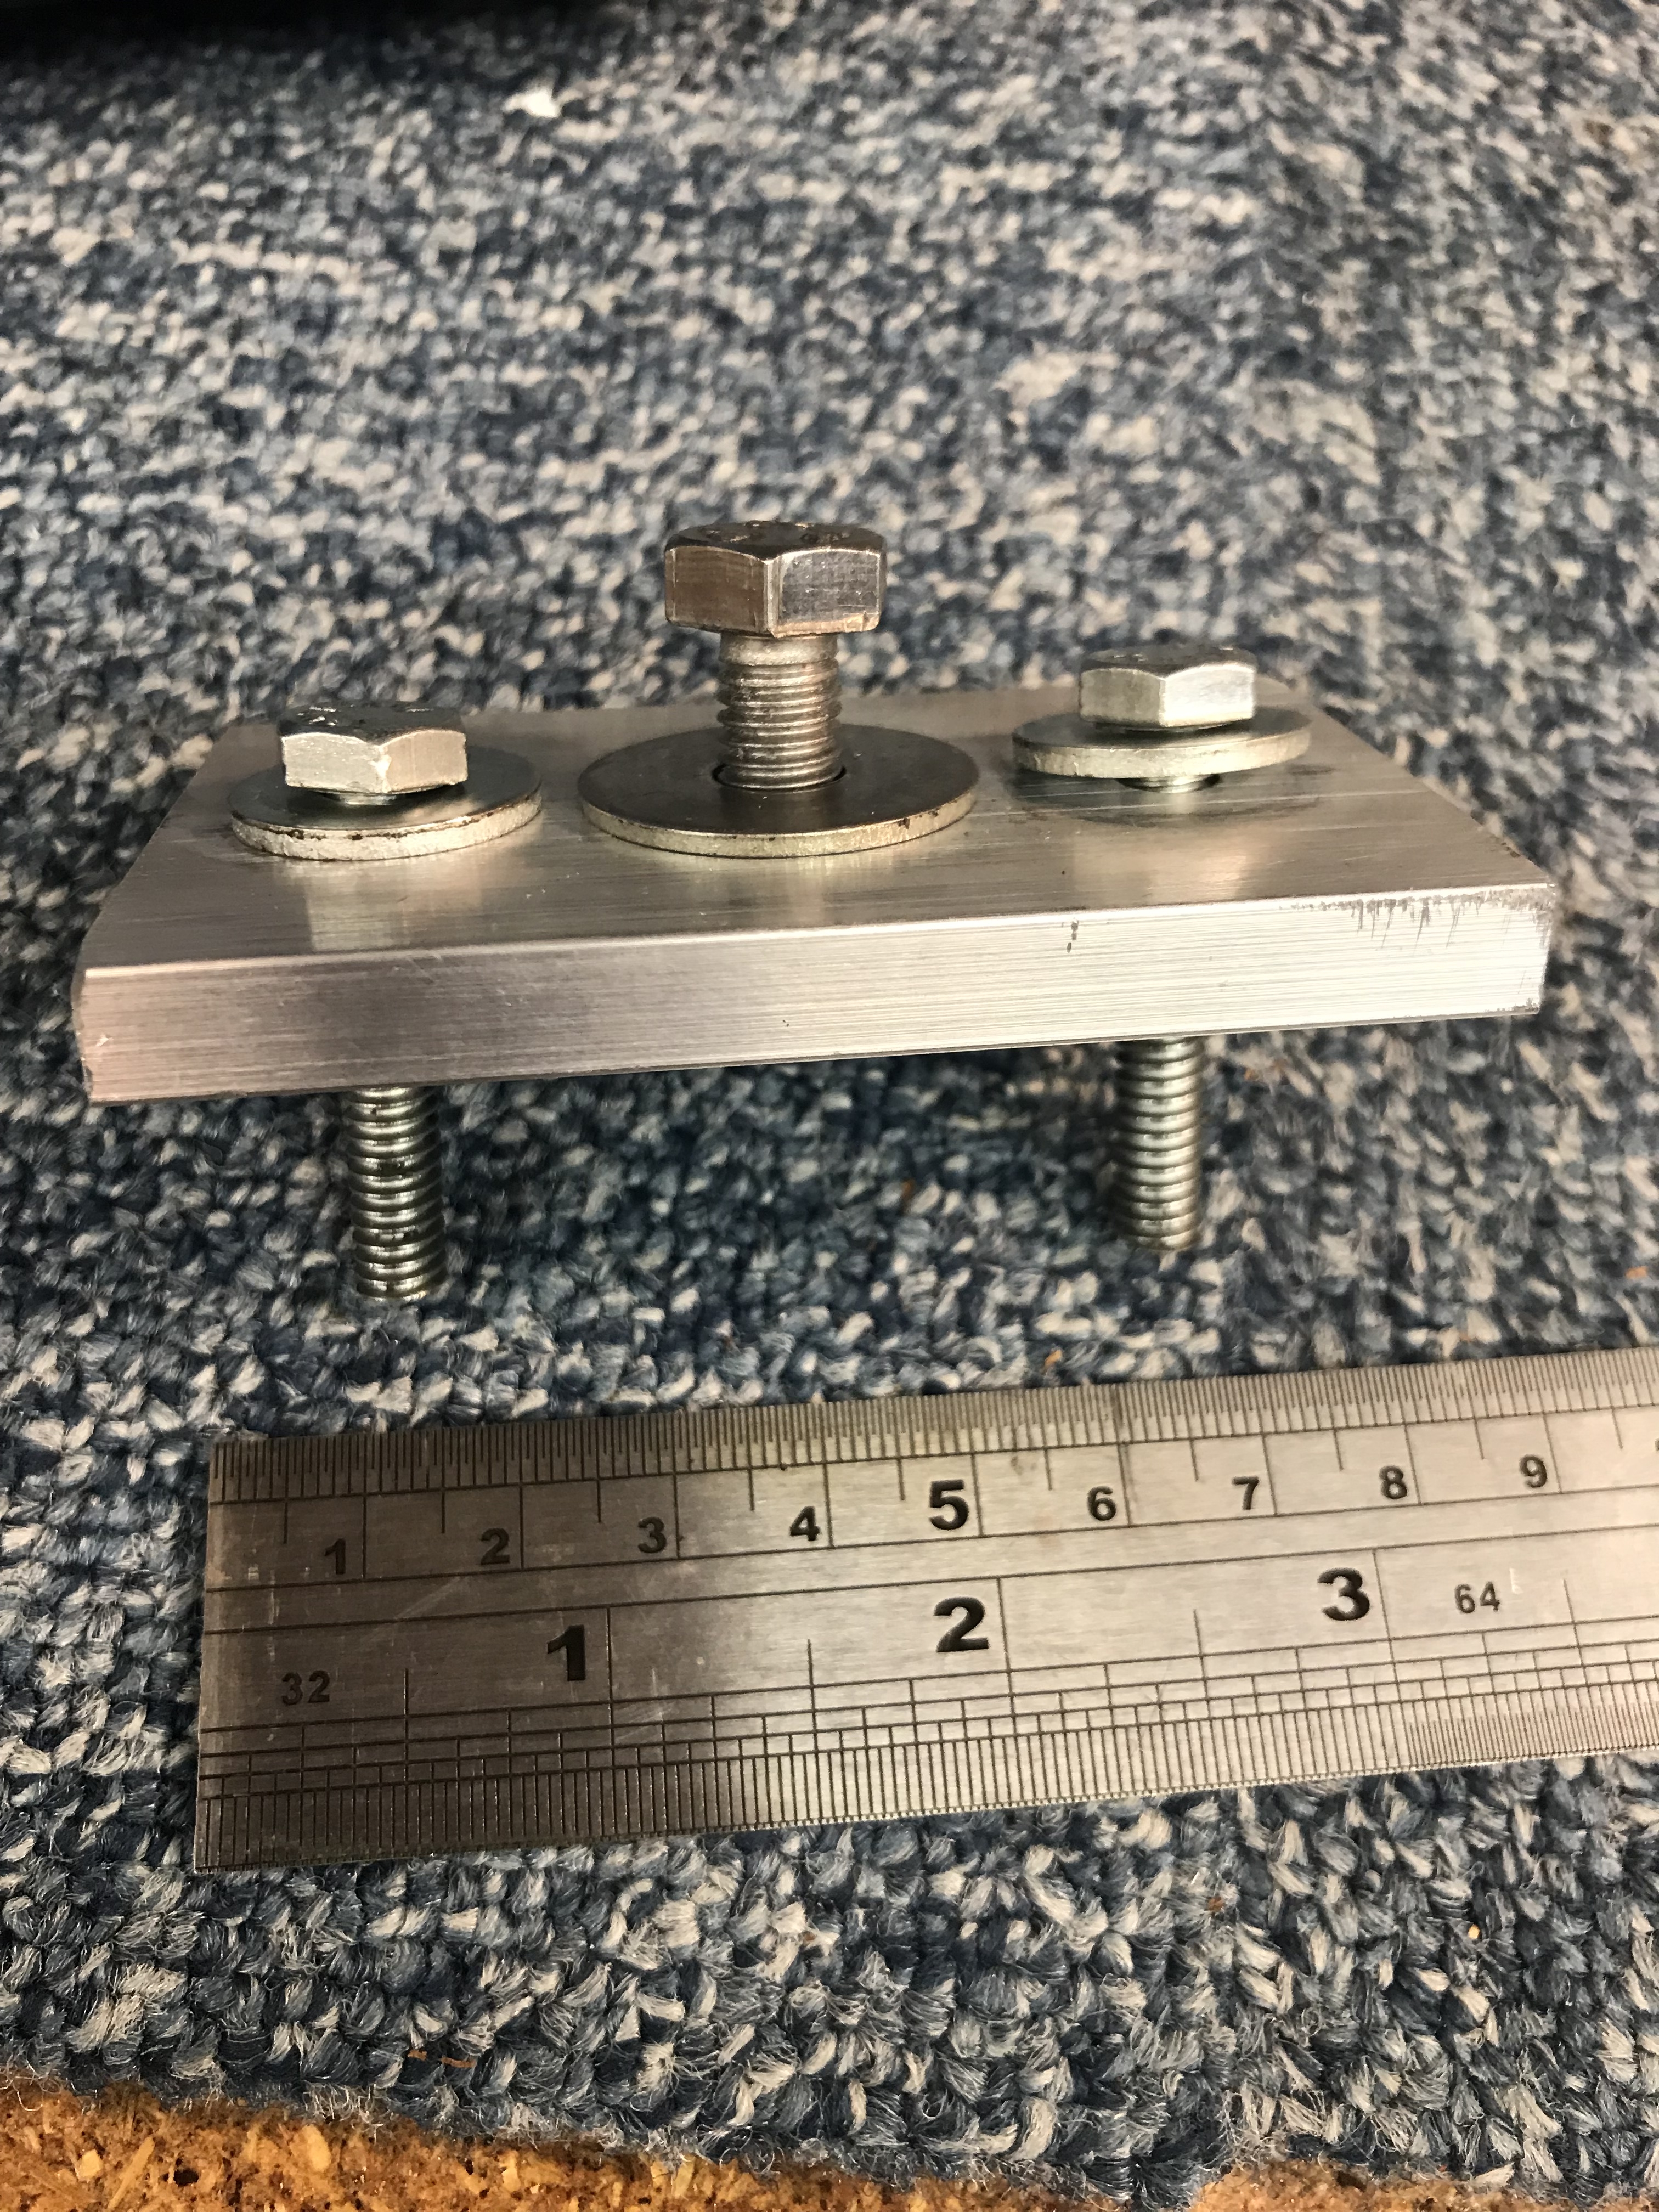
Just as an update, with reference to the flywheel removal and photo 7, I now see what I was missing and I've removed the two screws, along with the nut at the centre of the flywheel. I've not got any box steel bar handy, so I've sent off for some so that I can make a puller.
Tip when using the puller.
Tip when using the puller. Put the nut back on to cover the end of the crank. Protects the end of that difficult to restore left hand thread.
Thanks for that further tip.
Thanks for that further tip. I'll put the nut back on now so that I don't forget.
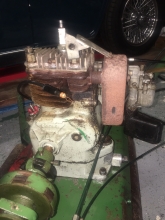
Can you see the engine clearly enough from the photos to say that it is or isn't a 75G14. It has the 6 cylinder head bolts. Also,the head is aluminium, but the engine itself is iron. As per your earlier post Wristpin, that seems to indicate that it's a 75G14, right?
I demand a recount ;-)
I demand a recount ;-)
I think I can see 8 cylinder head bolts which would make it a 98G14
98 is the CC and the engine is a Suffolk and Atco started using them after the Qualcast group (which owned Suffolk) bought Atco.
Hanging my head in utter
Hanging my head in utter shame! I didn't count the two bolts that secure the cover, so you are absolutely right, 8 bolts in total. At least you now know what sort of twit you are dealing with.
OK, let's start again. We have a 98G14, which is a 98cc Suffolk engine. Produced late '60s to late '70s? On the plus side, I have all that extra power now.
On the oil, this would be
On the oil, this would be fine, although enough for several oil changes -> https://www.ebay.co.uk/itm/Briggs-and-Stratton-2-Litre-SAE-30-Engine-Oil-100008E-Lawnmower-Garden-Tractor/162803331643?epid=2254772393&hash=item25e7d5b23b:g:AwcAAOSwBLlU4eJ6
You can get smaller quantities I think.
On the puller, for A98/A114 engine I used some ali flat bar I had, 8mm thick and centre tapped for M8 bolt. I guess box would work but more work to align the holes you need to drill through both sides?
Also, a bit of heat via a hot
Also, a bit of heat via a hot ari gun and some very gentle tapping around periphery of flywheel with a leather hammer helps it let go.
My experience is care of the ones who helped me out on here! WP, H,, HS
Thanks for the tip on the oil
Thanks for the tip on the oil Chris. Got some on order now.
Your puller design looks better than what I had in mind. Unfortunately I don't have any flat bar about either ... actually I do have some somewhere, but my garage isn't the tidiest and it would probably be quicker to order some.
Everyone's help is much appreciated.
Darren
Progress! Flywheel off,
Progress! Flywheel off, thanks to everyone's help.
Now, despite having a 50 year old car, it's on electronic ignition, so I've never played with points before. First thing I notice is that there is no gap. There should be one, right? And with cleaning, is a bit of emery cloth he way to go?
Any guidance gratefully received. Many thanks.
Emery tends to leave grit
Emery tends to leave grit where it's not wanted. Strip of 60 wet or dry stuck to a strip of old credit card or similar.
Gap . 18thou, probably embossed onto the flywheel! Slacken the crosshead screw and open and close the points with the eccentric slot head. Clean feeler gauge and when satisfied that the gap has remained where you want it after tightening the clamping screw, turn the engine to close the points a pull a strip of white copy paper through them to remove any traces of dirt . However don't pull it out so that the points grab the end and you end up with unwanted fibres between them - just open the points to release it.
Time for another sticky - cleaning and adjusting points!!!
Thanks Wristpin.
Thanks Wristpin.
Wet and dry I can do.
I'm not seeing ".18thou" embossed on the flywheel anywhere. On the outside, I see what looks like "E9901" or maybe "E9301". Inside, "Q3CX". Should I go with .18 thou regardless?
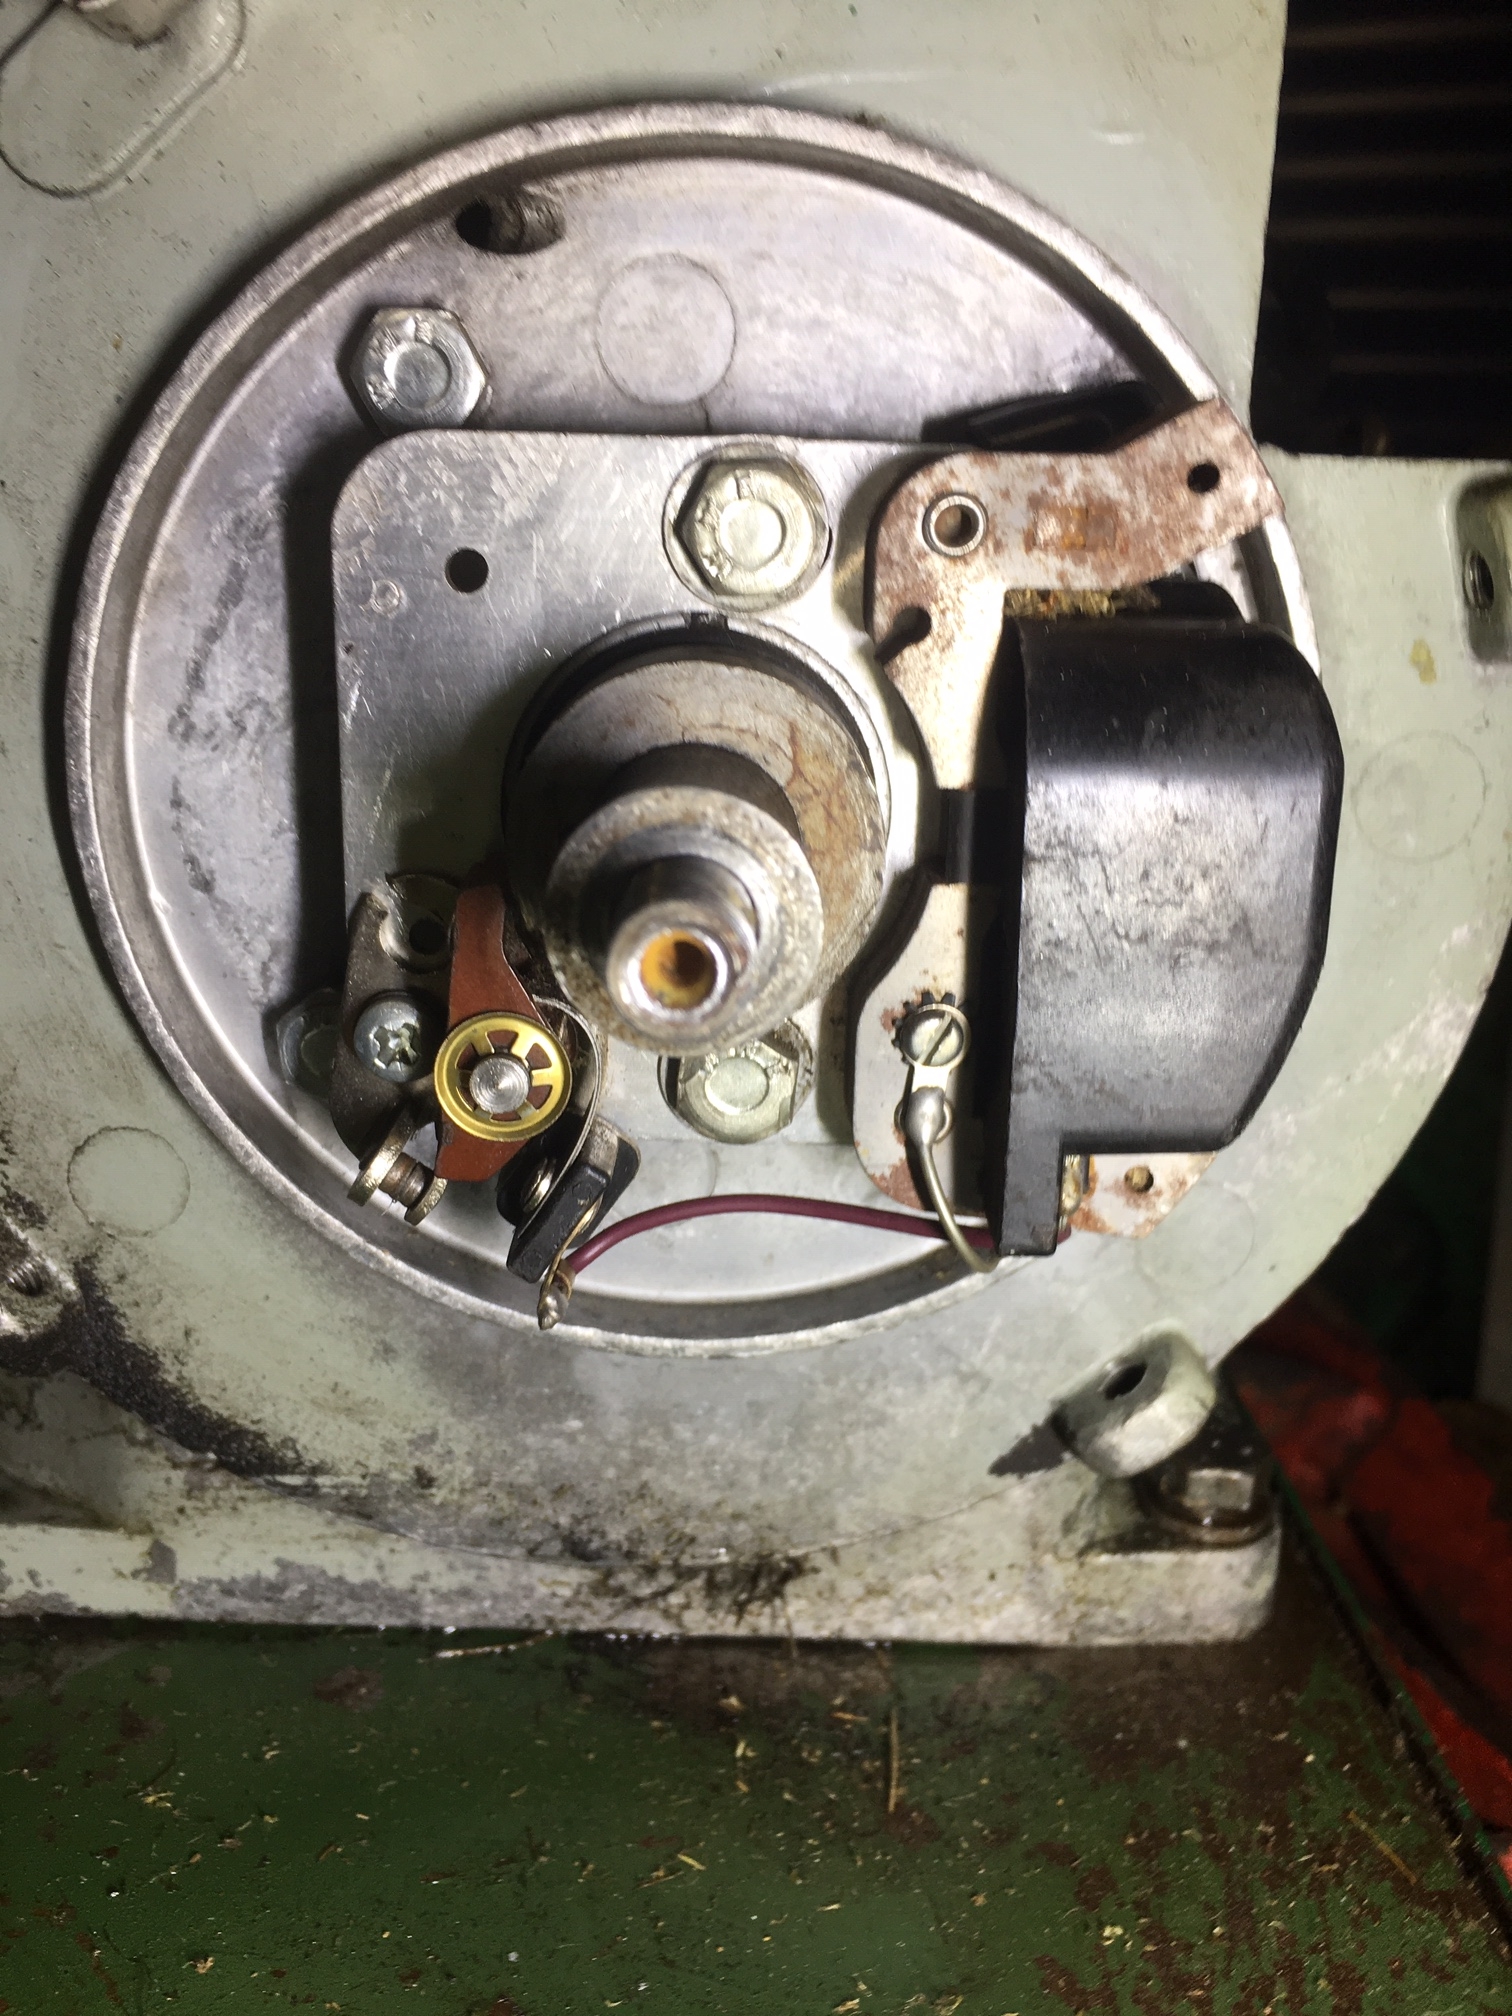
The crosshead to be slackened is the one just above the contacts, is that right? It's the only one I can see. Which is the eccentric slot head? Is it the part with the brass coloured part behind? If so, does it just screw in and out with fingers? Tried and it doesn't seem want to move, and I didn't want to force it if it's not the part I need to adjust.
I can see the contacts opening and closing as I rotate the engine, but I'm wondering if there's an easy marker anywhere that indicates at what point the points should be fully open? Apologies if these are daft questions.
Best wishes, Darren
The points are fully open
The points are fully open when they are fully opened - fully being the recommended gap. 18 thou is the gap and I’ve never seen a flywheel without the embossing but there’s always a first time!
I will dig out some parts in the morning and try to mark the screws. Just be a bit circumspect when tightening or moving them as it’s not unknown for them to strip.
EDIT
Can confirm that the spare flywheels in my collection are marked with the points gap in thou. "modern" ones 18thou and older ones 20. Yours definitely will be 18.
Eccentric adjusting screw. Not sure that I can find a stator to illustrate that and looking at some old owner's manuals, it is not shown so maybe you have not got one . Please post a close up straight on image of your stator..
I believe that Haynes published a Lawnmower Book so it may be worth looking for a copy. Many, Many years ago the Readers Digest (perhaps before you were born!!?? ) published one but I cant remember how detailed it was.
Guys a thoroughly interesting
Guys a thoroughly interesting read is this thread and Darren - you are not alone in being a total novice on petrol engines. But the more I get into lawnmower restorations, the more I am coming up against having to learn these basics.
Hortimech, Wristpin, your contributions combined with wit are highly valued and always educational. I think your suggestion on stickies is a good idea.
Hi Tony,
Hi Tony,
Thanks for your words of support. I'm always keen to learn something new and as you can see I'm never frightened to ask questions, or to show where I'm ignorant of something. I try to find out as much as I can from reading, but nothing really beats having guidance from someone who has lots of knowledge and experience. I am conscious that it can be exasperating to deal with novice questions relating to very basic issues, so I do appreciate anyone who takes the time.
Darren
Thanks Wristpin.
Thanks Wristpin.
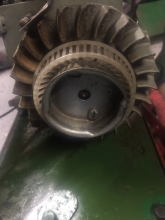
I've been looking over the flywheel again, but I'm still not seeing any markings to indicate points gap. That's not to say that they are not there and I'm just missing them. I have been known to overlook the obvious! Photos 1 and 2 below show back and front of the flywheel. I wonder if it's non standard, after market perhaps.
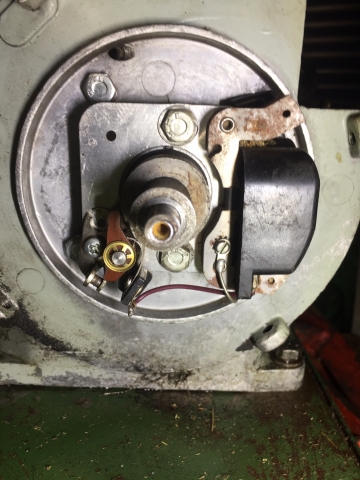
Photo 3 is a close up of the stator ("stator is a new term for me, so I hope I've got it right).
I did buy a copy of the Haynes Motor Lawnmowers book, but there's little in there that I can find on adjusting points on this model.
Thanks again for your help ...
1.
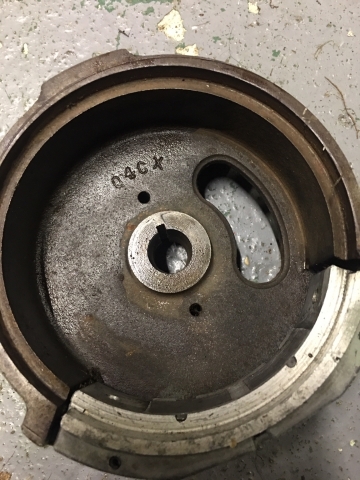
2.

3.
Odd about the missing gap
Odd about the missing gap setting; not by any chance on the inspection window cover?
Eccentric adjusting screw - missing! Look just above the crosshead clamping screw and there’s a space with a screw hole in its centre. Put a fairly thick flat blade screw driver into the slot that’s at approx 11 o’clock and twist it to open and shut the points when the heel of the moving point is on the peak of the cam.
Yes, spot on, "Set points gap
Yes, spot on, "Set points gap to .018" is marked on the inspection window cover.
I did wonder if there was meant to be another screw there. I'll have a go and report back.
Thanks.
Well, I can open the points
Well, I can open the points using the method suggested, using a flat blade screwdriver, but of course without that screw, the points just close up again. Is it a special type of screw that should be there? If so, where would I get one?
Hold the points open and
Hold the points open and while holding them just tighten the crosshead screw to lock them!
Tried that, but no success.
Tried that, but no success. As soon as I spin the engine over a few times, points close up again. That crosshead screw won't bed down, just keeps turning, so perhaps that's had it.
Sounds like the same heavy
Sounds like the same heavy handed character that wrenched out the eccentric screw , also overtightened the crosshead and stripped thread in the stator. You need to find a fatter screw ; or dare I say it, a small self tapper .
Well, it was a fiddle, but I
Well, it was a fiddle, but I've managed to get a little nut behind that screw (as opposed to the nut in front of it), and secure it, so that for the moment at least the points gap is holding. That's the good news, bad news is I'm still not seeing a spark. I've got one of those gadgets that sit between the lead and the plug, that lights up when it receive power. No lights on it when I spin the engine by hand. I imagine I'd see something if it was getting power, or would it need more of a spin?
Give the points one last
Give the points one last clean paper pull through. Then remove the plug connector and holding the ht lead just off some bare metal give the fly wheel a few sharp flick overs. You need the equivalent of 250+ rpm for your points system and as much as 350 for later electronic ones.
If that doesn’t produce a result it’s beginning to look like a failed coil so you need to find a repairer with a coil tester - mower people with the right kit are getting a bit thin on the ground these days but the vintage motor bike fraternity often still have the necessary testers.
I gave it once last clean
I gave it once last clean with white paper as suggested. Then reassembled. Unfortunately, still no joy. I tested for a spark in the recommended manner, but I'm not seeing anything, so it does look like the coil has failed. If anyone knows where I could get it tested and repaired, then please let me know. Alternative is a replacement, but I'm wondering if such things are easy to find.
Other than that, I think I'm at a dead end with this one.
Best wishes,
Darren
One final shot will be to put
One final shot will be to put the recoil starter back on and see if the additional increased rpm will produce a result. If you have a decent sized mains powered drill you can do it with a bit less reassembling.
If the coil has failed there’s no repairing it but there should be plenty of used ones about. Yours is one of the later ones incorporating the condenser but another older stator with a separate coil and condenser can be used. New coil/ condenser units to fit your stator are available from the likes of Villiers Parts.
Thanks Wristpin. I
Thanks Wristpin. I reassembled the recoil and gave it a go, but no luck. I'll look around for a replacement.
As it happens, I've just doubled my collection, by buying a Atco 14 inch, probably late '60s to mid '70s. Also a non-runner. Typical if it's the same issue! Picking it up on Monday.
No, it could just be that the
No, it could just be that the contact breakers need cleaning. To do this properly, you will need to remove the flywheel (hint: the flywheel nut is left hand thread), you will also need to make yourself a puller, this uses the two threaded holes you will find after removing the starter pulley. You just need a short piece of thick bar and two long bolts. I am sure you will work it out.